Knit knit knit

Mondays are the best days of the week. Mondays mean that I can get back to the workshop and crack on with my current projects, and they also mean knitting circle evening.  For quite a few months now a group of wooly fanatics have been getting together, taking turns hosting dinner and treating each other to tasty nibbles and delicious cakes.  We're an odd bunch, at first glance.  From afar I bet you couldn't guess we were meeting to compare baking skills and purling achievements.  But this lovely oddball collection of friends have developed a healthy addiction to wool and all things associated with it.  Its one of the highlights of my week.

I must confess, the past 4-6 meets I have indulged more on the three course meal than stitches and projects we each have.  Things were going so well, until I finished my bonbon; the cherry on top of my hand knitting hat.  Since then projects have started, and fizzled out.  There hasn't been anything that I've wanted to get my teeth into, except...

The penultimate project that I still insist on starting ... AND COMPLETING, is The Giant Sock Project, or The Knitted and Felted Adult Sleeping Bag.  Granted, it'll take a lot of time, and a lot of wool.  Maybe it's these factors that have curbed my enthusiasm.  There is the beautiful, soft, perfectly formed cocoon-shaped sleeping bag in my imagination, can it be realised?!  We shall see.

I think learning to knit a normal sized sock and how to felt may actually be a sensible starting point.  Hence this little tester (please glance over the poor and ugly little sample square, it's not my best work)

It may seem like a small step to you, however this teeny-tiny little square has given me hope that I shall be sleeping toasty warm next winter.

The Mystery Project & New Toy

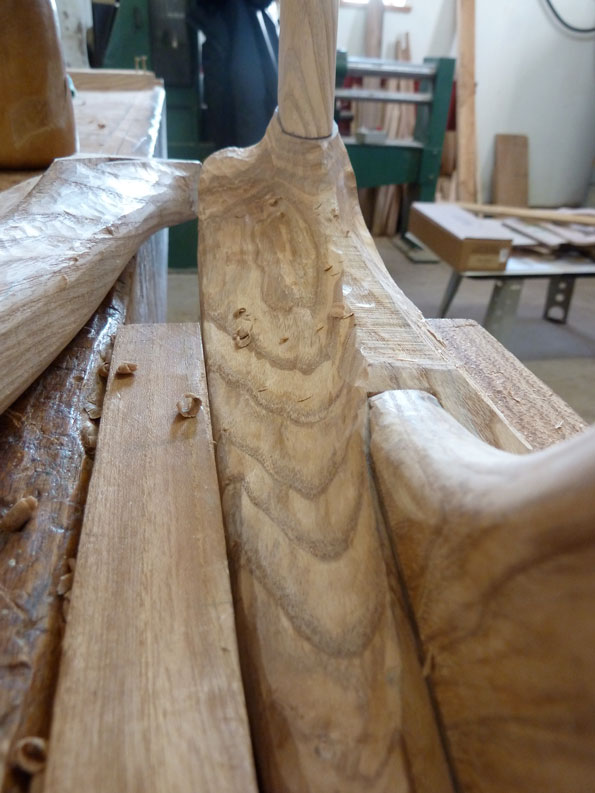
OK, so I've been very very quiet recently, but that doesn't mean I haven't been beaving away.  I've been working on a very special project, but it has to be a secret.  Here are some teaser photos which I hope don't give too much away.

It's really pushed my techniques and skills, there have been angles aplenty going here there and everywhere, which can be a right pain to get right.  There has been lots of routing, spoke shaving and sanding, which I'm pretty accustomed to by now.  However, wood carving is a whole new experience.

It has been pretty exciting being a little freer, with my mallet in hand, smacking little chips away, one at a time, bit by bit.  The results have come out far better than I imagined, so I'm pretty chuffed.  Unfortunately I can't show anymore pictures until it's finished and the secret is officially revealed.  Watch this space...

To prove I haven't been completely dossing, here's what all my hardwork over November and December has afforded me.  Christmas certainly came late this year when the DHL man handing over a parcel with my new hand plane.

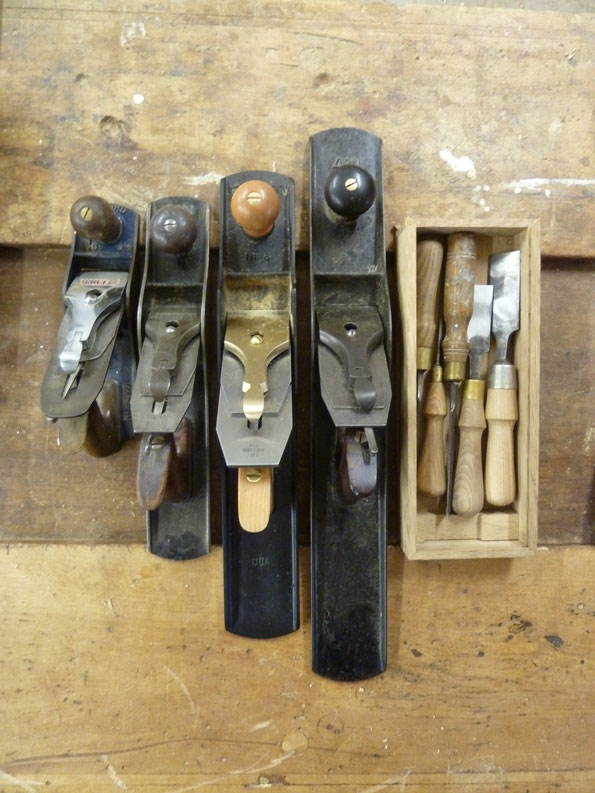
It's a Lie-Nielson No.6 Fore plane.  That's like the mercedes of the hand tool.  It's shiny, beautifully made and rides like a dream.  In tool geekdom, it's a definite must have!!

Huw is the tool historian, he can name, date and describe in detail the use and any quirky story associated to any tool, tractor or rusty metal.  He makes hand planes, like this one but far more beautiful, by hand in his shed - as a hobby.  Any given weekend he is hunting out rusty heaps of tractor metal to make new again.  It's a amazing what he does and how well he executes it.  A very good person to know, therefore he was on hand to supervise the first honing and sharpening, just to be sure.  It glides over the wood so smoothly, and it is guaranteed square and flat every time, which was a mission with my old beloved No.7.  Hopefully it will serve me well for the rest of my furniture making career.  Nerdy tool chat over, I'll leave you with a portrait of my tool collection...

Going metal

I've been scrap-yarding. A friend of a friend has a whole bunch of rusty, old metal ripe for the picking. It's a treasure trove of tractor parts, ancient, dis-used agricultural equipment and other bits n bobs. I was like a kid in the sweet shop. It's amazing to see the quality and weight of how things used to be, and the shapes and details of some of the cast pieces are beautiful.

My imagination was going nuts, I wanted to leave with EVERYTHING. Thankfully, my friend reined me in. I settled for an early 20th Century cast window frame and began plotting an experimental piece that'll be my first welding project.

The lovely fellas at the steel engineering place sorted me out with the lengths for the framework. Ideally I wanted old stuff so it had the rusty, aged texture, but we couldn't find enough. Not a problem, we came up with an idea that may, or may not give the desired look.

So, after a few practice runs I pounced on squaring up the right pieces and welding them all together.

After the last bit of finishing touches, the frame was finished. By next week, it should be back at the workshop for the next phase...

Tea Time Tray

Over the past couple of weeks we've been busy blitzing through the workshop, cleaning and clearing out a few things. Its all in aid for the Open Studios event starting 17th September until 2nd October. Organised by the wonderful people at Eden Arts, over 100 Cumbrian artists and craftspeople will be throwing open their studio doors to the public and giving demonstrations of their unique skills. Everyone at DF Timber have taken it as an opportunity to publicly mark the hand over from Danny Frost to Huw Lowden and Steve Younger, the company's long standing employees. Its an exciting time for them, I wish them all the luck in the world.

Check out the website and keep an eye out for the bright yellow signs: www.c-art.org.uk

So, it was during this clear up that I stumbled on these old kitchen cupboard doors, and seeing as the new office needed an all-important tea-time work station I decided I'd turn them into a tray.

Kitchen door material

I decided I'd try some new techniques so I designed it with a wooden frame with curved corners.

Using off-cuts of Elm, I machined them up to strips of 40 x 40. The wobble saw on the spindle moulder was perfect for cutting out the L-shaped profile of the framework.

Wobble saw for frame

The corners were the really tricky bit. Luckily I had a beastly drill bit that was just the right diameter for the curved look I wanted. However, I had to be careful with the grain direction so as to not cause any weak points when its all glued together.

Once the drill (and pillar drill) had finally munched its way to just the right depth (it didn't half get hot and smoky) the corners with the perpendicular grain were cut out and squared off.

With a basic jig for the dowel joints, holes were tentatively drilled into the end grain of each piece.

The band saw cut out the curve, and all that was left was to spoke shave them to shape. It was so satisfying, I can tell you! The colour change from the frame sides to the end-grain corners really comes out now its oiled and after a quick sand with 240, its nice and smooth.

The kitchen cupboard doors are made of dodgy chipboard so the edges were sealed with a little PVA. Just gotta wait for the glue and oil to dry before sealing it all together...

2Hour Stool redefined

The first 2hour Stool design didn't quite hit the mark, so I smashed out a new prototype which had a few dimensions changed, joints revised and techniques practiced. Spoke-shaving the bevel by hand may mean I have a 4hour stool (at least), oh well, I'm so chuffed with how its turned out. The biggest difference has been the stunning off-cuts found in the machine room. A pretty rare 15" wide Wych Elm board sat smiling at me, and it's different grain direction has really added something special to it. Coupled up with the bit of Ash found in the same pile, for the legs, its the prettiest prototype I've ever made. While machining the Ash, its grain got more and more beautiful, and then cutting it to shape and planing, the ripples just shine. A poor mans Sycamore, lovely.

I've also included a few oiling pics, purely because I always get a kick from the deep, rich change of colour and reflection in the wood on the first coat. The camera really doesn't do it any justice.

Next is to make up some time saving jigs, set up some batch manufacturing and practice the hand skills, then, ta-dah, pips stool.

Stool no.1
Happy oiling Elm
Second Prototype

Challenge: 2hour Stool

The workshop has a challenge; to create a economical stool that's quick to make, practical and, of course, good looking. The record, from machining to finished product, goes to Huw's elegant plinth stool, created in 2.5 hours.

So today I set off at 8.30am, armed with one drawing and oodles of positivity that I could come close to competing with the Champion. As the day closed in at 6pm, I had to tip my hat in defeat. Although, it was only prototype day...

Elm legs
Mark up / square off
Cross rail detail
Stool gluing up

Stages of Handmade

This blog is the daily diary of my current projects, with a few inspirational finds sprinkled inbetween.

From timber selection, machining, all the way to a finished and oiled one-off piece. So stop by and check what I have been up to. It'll be exciting to see each piece develop and come together.

Arts & Crafts Bookcase
Ben's bedside table

A few of the construction and gluing stages