Boot Bench Part 6

Waxed and Oiled Dark Leather

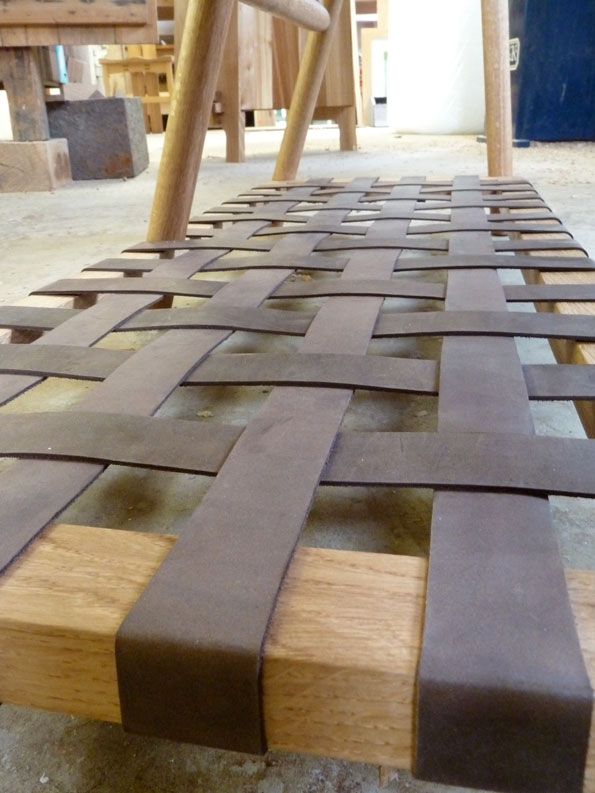
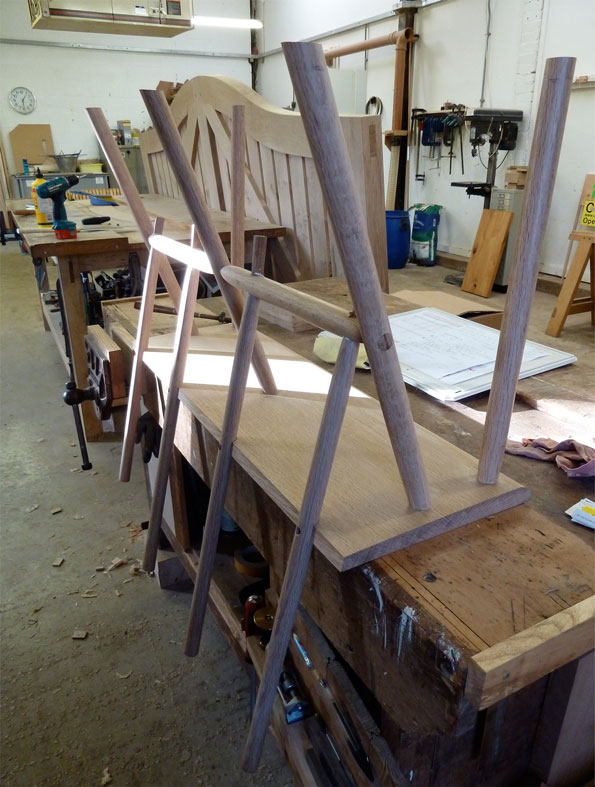
Arriving at the workshop Monday morning I had a lovely big parcel to unwrap.  The leather had arrived and it was definitely well worth the wait.  A deep, dark brown, treated so it will age and texture very nicely over time.  With my lovely assistant, Frank, we set off cutting it down to 30mm strips.

It was pretty exciting to be using a very different material, with its very own quirks.  Cutting was fairly easy, but keeping the tension even so the strip remained the right width along the whole length meant precise, regular checks with the ruler and a firm hand down on the straight edge.

Cutting leather to strips

I wanted the strips and gaps to echo the dimensions of the rest of the bench, there is a 30mm theme throughout the piece.  Once the first leather ends were tacked on, evenly spaced, we were flying.  Poor Frank had to put all his strength into stretching the leather as taut as possible, while I hammered the tacks in.  Thanks to his help the rack is lovely and firm, ready for all the wellies its made to hold.

Stretching & weaving leather strips to bench rack

And there you have it... Project Boot Bench finished.

Just in time for the workshops exciting trip down to Birmingham NEC, where we will be exhibiting at the Grand Designs Live 7th - 9th October 2011.  It's all hands on deck for all the last minute bits and bobs for our stand.  If you happen to be in town, pop along and say hello, you can even see my Boot Bench in the flesh.

Oak Boot Bench w Leather rack
Oak Boot Bench w Leather rack_side view
Oak Boot Bench w Leather rack_rack detail
Oak Boot Bench w Leather rack_back view

Boot Bench Part 5

It was the week of the spoke shaver!  Blimey, two days spoke shaving the back rest.  Such a good workout, and when all goes well, hugely satisfying... A couple of templates were used as aids, but most of it is reliant on touch and look.  You would think that slogging away at some pretty tough oak for two days would put you off, but weirdly, the spoke shaver is currently my favourite hand tool.

Spoke shaving the back rest
Half way there
Half way there

Another template was used to mark out the corner details.  Because the back rest is curved along its length, it needed a flat piece of wood as its base, so when I put it through the bandsaw I can guarantee a square cut to the rest of the bench.  More spoke shaving to get that lovely smooth finish, as well as the subtle transition from flat to rounded edge on the top and bottom of the back rest.

A quick dry fit and the curve and joints worked out OK.

Rounding off the corners and testing the fit
Gluing up the back rest

Now it was time for the nitty gritty finishing touches, as well as the happy job of clearing away all the MDF jigs that have been camped under my workbench.  All the screw holes have been plugged with that lovely dark Walnut... Oh Walnut!  It was an exciting week at the timber yard ... milling a big English Walnut, I'll post about that some other time...

firewood jigs and walnut plugs

So here it is.  All the finishing touches, cleaning up and final sanding done.  Here's the oiling stages.  Oak is one of the few types of wood I enjoy oiling.  The colour really deepens and develops a rich shimmer.  (Sycamore and with other the light woods, the grain comes out beautifully, but yellows in colour.)

Oiling up
Oiling up
Oiling is so satisfying

I had hoped to have finished it this week, but my leather never turned up.  So Monday - more oiling and, hopefully, adding the strips of dark leather.  Watch this space...

Boot Bench Part 3

Where does the week go?  Things are really picking up pace on the business front, and my current project has really taken shape. This weekend also saw the first day of the workshops open studios exhibition.  If you haven't already done so, pop onto the C>art website and see all the other local Artists and Craftie-types that are opening their doors to the public.  Its an exciting time, that justifies all the hard work and dusty cleaning spree. (http//:www.c-art.org.uk)

So last week I had set up a jig for drilling the back-rest spindle holes into the seat.  All went well and I moved onto using the amazing big sander in the machine room to taper the seat ever so slightly across its width.  Planing the curved edge onto the front bottom of the seat took a while, but the shape is just as I wanted.

Shaping the seat
Shaping the seat

All the final prep was done for the through joints on the ends of each spindle.  Lovely English Walnut was kindly offered to me for use as wedges, which is going to really add a lovely contrast to the final piece.  I've been dreaming of making something with Walnut, it's such a beautiful, dark wood.  Very rarely does a Walnut tree pass through the timber yard, but when it does it gets quite a lot of attention.  I have my eyes on some, I must concoct a wonderful project to do it justice.

Wedged joints
Wedged joints

A couple of dry runs, putting everything together the back-rest spindles have been fitted nicely.  Jig no. 6 was rustled up for the secret screw holes that will join these spindles to the seat.  Finally, an all-over fine finish sanding for all components before gluing up  (if this doesn't make any sense what so ever, all will be revealed...)

Final prep for gluing

And here we are...  glued up with wedges and all.  I also got the boot rack frame mortise and tenoned and glued up.  Which leaves a bit of cleaning up around the joints and phase 3 of the project to crack on with Monday morning.

Glued and wedged
Glued and wedged

Check out Huw's incredible sliding gate in the background.  It apparently weighs 300kg, is 80mm thick and beautifully finished.  You don't want that to fall on your toe!

Boot Bench Part 2

It's been a very busy week, crammed full of all sorts of important bits n bobs.  The boot bench progress is coming along steadily. The spindles all have a lovely finish now that I've sanded them with 120, 180 & 240 grit.  All the components are pretty much done, now it's time for the jigsaw puzzle of making them all fit beautifully together. Firstly, the holes for the dowelled joints.  A few jigs and drill supports needed to be made to make sure there was no tear on either side of the hole.  The holes obviously want to be lined up and square so my legs go in the same direction, quite a bit of time was spent centring and squaring up each spindle.  With a newly sharpened forester bit, I'm really happy by how they turned out.

Drill jig
Drill jig

After a little bit of sanding back and dry clamping up I had the essentials all in place and labeled.  This is the really exciting bit when you start to see the design come off the page and into the real world.  From this stage I can reassess the construction schedule, theres going to be a lot of bits and angles that must be glued up just right, at the right stage.

giant jigsaw puzzle
giant jigsaw puzzle

Last thing of the week, create Jig no.4 for the angled joints in the seat...  Looking forward to Monday

Jig no.4
Jig no.4