The Mathilda Chair Part 4

Getting the joints smoothed out

The clamps came off and I set to work to get the sweeping lines that I hoped to flow across the whole chair.  The smooth lines will be a tactile feature for the baby, but also to give the impression of one piece of wood.  I think if it weren't for the crazy grain of this Olive Ash, it could possibly have had that effect.

This form needed plenty of sanding and careful chiseling.  The curves meant that the grain direction was changing at random spots all over the chair.  Here's the shape as it was before the final sand, still with its sharp, crisp edges.

Flowing curves before final sanding

And here's the chair all smoothed and sanded ready for that very exciting first coat of Danish oil.  We had been eagerly waiting to see how this dark Ash will oil up.  As expected the grain and dark colours jumped out at us.  Over time this chair will darken, and the markings may calm down a little.  A good bit of use (and a touch of baby dribble) will leave a wonderful matte finish.  The wonders of wood, it gets better and better with age.

I hope this little chair holds lots of fond, happy memories for its little owner.  May it serve her well.

The finished Baby Chair - before oiling
Curves and joint details - before oiling
The Baby Chair - oiling up
The Baby Chair - Complete

The Mathilda Chair Part 3

Things are coming together - taking a pause

Last time I left you with the arms practically finished.  Here's the main chair components put together on a dry run.  It's all coming together nicely, but I was getting anxious to smooth out the joints because that's when the flowing form will really shine.  Firstly, that form will really come from the addition of the back rest, from then on I can work away the overall form to make a comfortable seat.

All the straight edges went a long time ago, but I needed to squeeze the arm / backrest joint so that all the gaps closed up nicely.  Instead of clamps I had to use a peg.  The holes on either piece were off-set ever so slightly.  That way, when I tapped the peg in it pulled the joint into itself.  A handy little trick that worked really well.

Exposed tongue and groove joint with off-set pin

Now the fun part!  I love my power tools, it's a well know fact.  To chip out and carve the shape quickly I armed myself with a angle grinder with an Arbortech bit (and some noise-cancelling earphones and a bit of AC/DC) Needless to say, I was having a great time.

Armed with an Arbortech bashing out the sculpted form

I sanded and chiseled for the finer shaping.  However, once it was all glued up there was plenty more to be done as the smoothing out of the joints did alter the shape fractionally.

A little bit for fine tuning before gluing up

The Mathilda Chair Part 2

With the rough shape constructed, the overall form and flowing lines I had envisioned needed to be worked into the wood. Firstly, the rounded edges of the sides were a doddle with the use of a router, a little bit of spoke shaving and plenty of sanding.Small rails were made with through-tenons to help break up the look of the structural joint of the side. Through-tenons are also a wink to the Arts and Crafts ethos of deliberately exposed construction to demonstrate the piece is handmade. This is something I have noted local furniture manufacturers still do here in Sweden. (I'm on a wee trip away) Carefully housing the seat into the sides means it behaves structural and minimises any necessary dowelled joints that might distract from the flowing form.

Good bye corners
Good bye corners

Right, the main part of the chair is pretty much there. Next, the exciting carving the general shape of the arms and back rest. To make sure both arms matched, it was vital that each major shape change was done at the same time on each side. Using 4 different sized chisels along the changing grain directions and a lot of rough grit sand paper the shape smoothed out slowly but surely. I have to say, the freedom of this process was a lot of fun.

Roughly hand carving the arms
Sanding and smoothing out the arm's shape
Carved arms stage 1 complete

Here it is, the arms and the sides. Where they meet, the joints will smoothly blend into each other, however that can only be done once it's glued up.

Flowing from arm to leg

The Mathilda Chair Part 1

The Mathilda Chair And now I can present to you my latest project, completed and delivered.

An ambitious curved form, designed to be a stylish first chair for a little baby girl.  The ergonomic positioning, and deliberate wide seat will make those first unaided lounge-y moments easier.

Here's the design to product process:

From Design to Product

And here's the story:

Not long ago, my client came to me with an idea.  It had been recently announced that there will be a brand new member of his family arriving, and wanting to welcome the little tyke into this exciting world, came to me to create something special.

After a good think, some chats and brain storms, it was decided that, as much as a high chair or cot or wooden toy will be helpful, it just wasn't special enough.  Nope, this baby needs something that will be exceptional and everlasting.  A memento to her first few years.

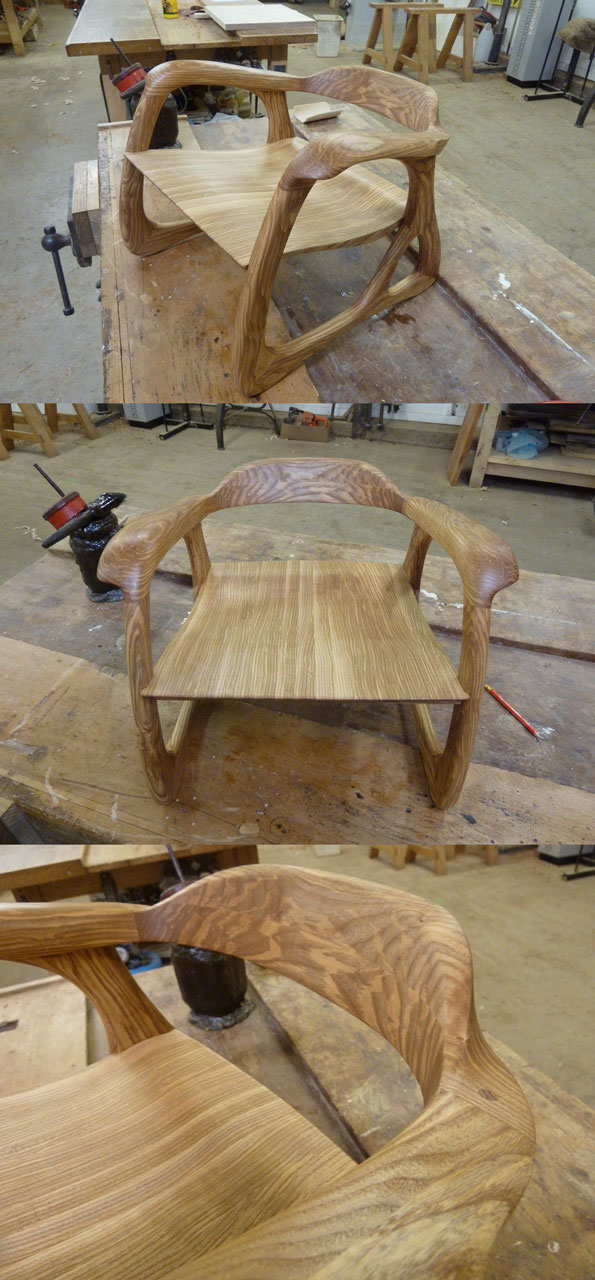
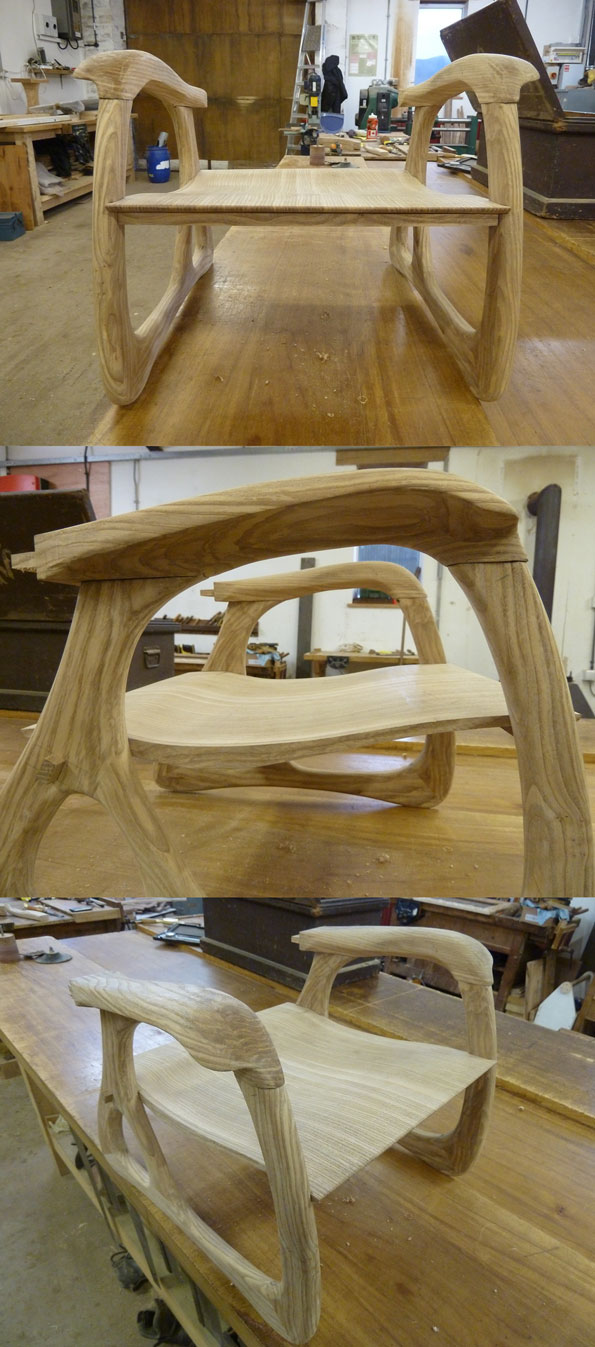
Taking note from her Scandinavia roots, and wanting to add a wee salute to the design, craft and material ethos of the region, I designed a scaled down lounge chair.  This design has unusual proportions for a child's chair, but I thought the low, reclined position would be ideal for those early stages of sitting.  In the brief arms were a must, so falling off was avoided. From this starting point I decided to take this opportunity to create something tactile, sculptural, as well as developing a unique chair structure.  A mini chair for a mini lady.

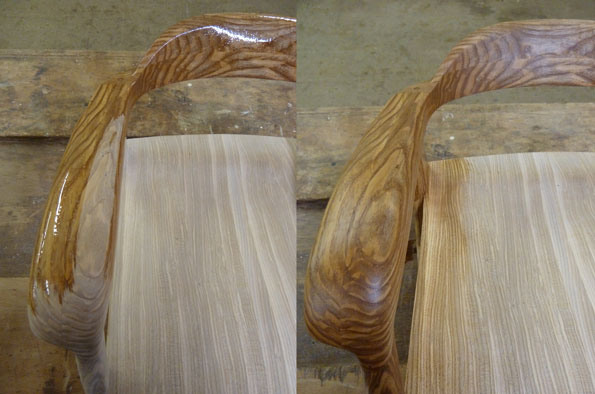
There was much discussion about the type of wood.  Traditionally, furniture of the era I took inspiration from would use dark timber with hardly any grain markings.  I guess as to not distract from the form.  However, being a wannabe British Wood Ambassador, making a wooden chair by hand, from local timber it made sense to scrap that thinking and go with what Cumbria had to offer.  About 20 miles away from the workshop, in Penrith, there was a pretty old Ash tree.  I never saw it being milled, as that happened some 2 odd years ago, however I can tell it was a slow growing old tree by its extraordinary colouring and grain markings.  Ash is usually pale in colour with high contrasting, uniformed grain.  The boards Huw helped me pick out were distinctly dark with an almost tiger print pattern.  It was stunning - Olive Ash it shall be!

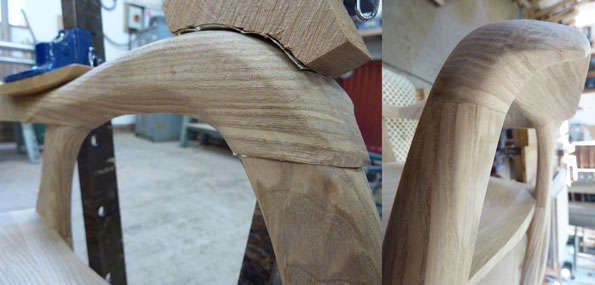
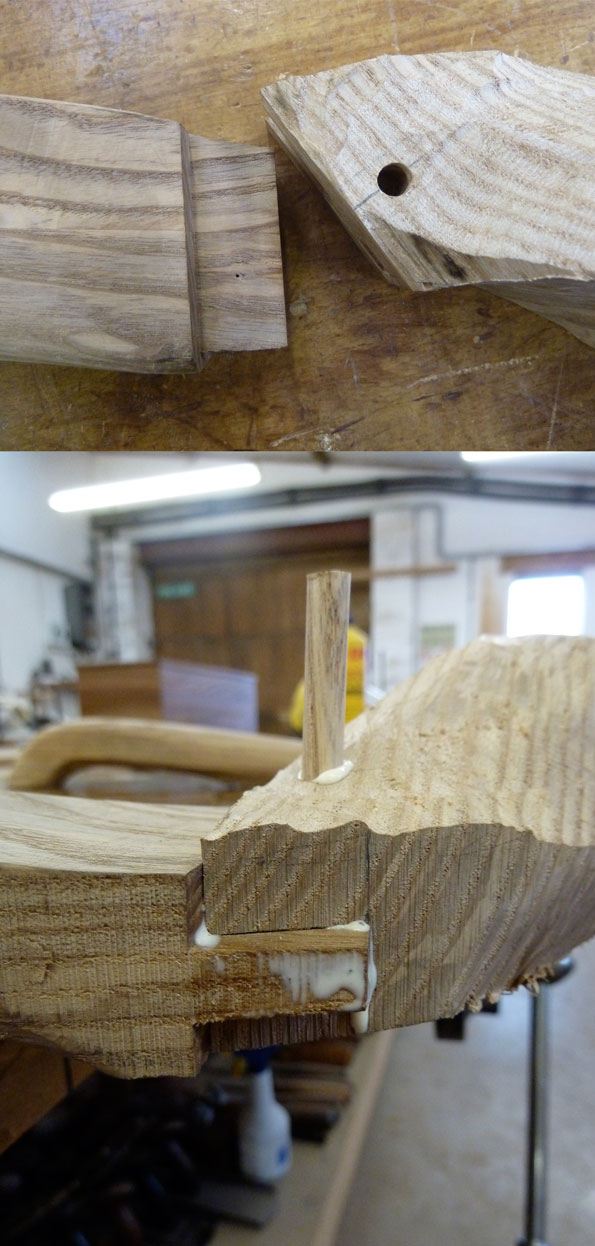
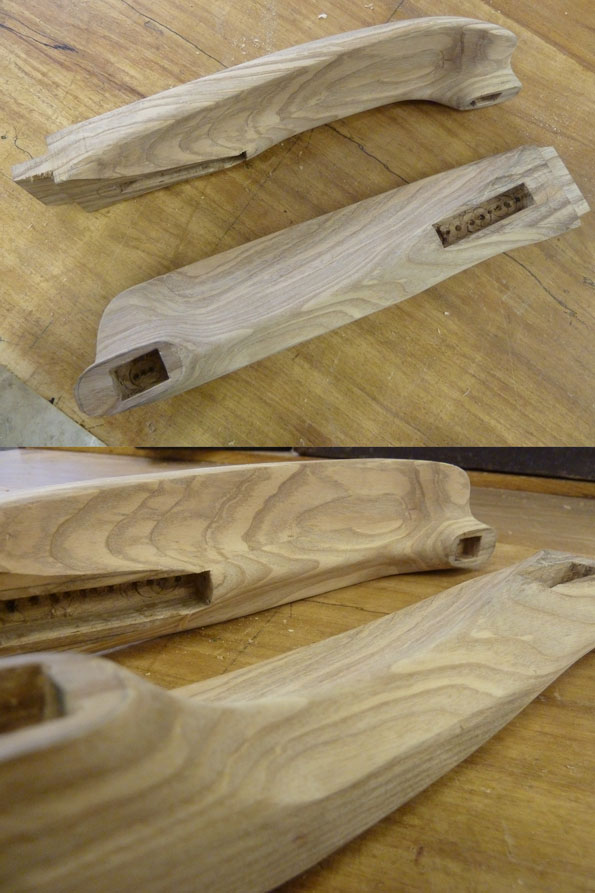
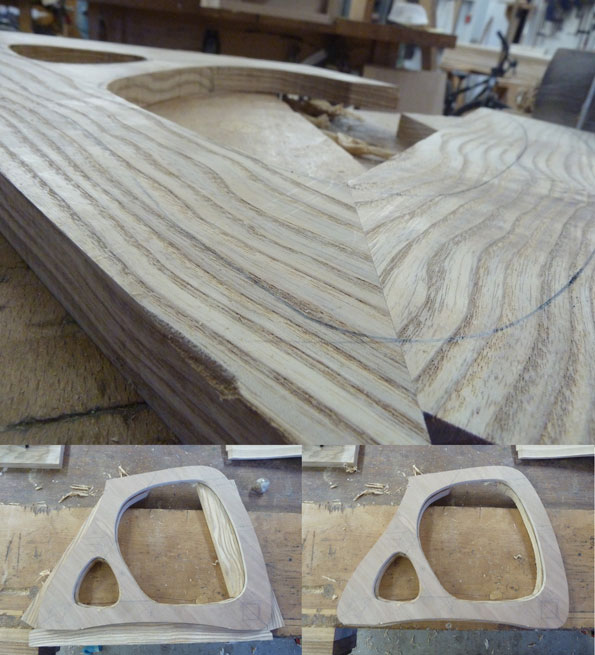
I have to admit that I got a little carried away in the beginning.  I had never used a spindle moulder before and the possibility to make multiple, delicate forms one after another, bing, bang bosh, was too exciting to skip.  I bashed on with the seat form first; a flowing curved shape, laminated with biscuits.  Here's the jig:

Laminated seat from Spindle Moulder

There aren't many straight lines in the final piece, but you've got to start somewhere.  The tricky angled joints were glued up before any shaping was done, that way clamping was a touch easier.  A template and the good old trimmer bit on a router made the shaping of the sides quick, easy and matching.

From straight lines to sweeping curves
The basic components, ready for sculpting

So far so good, if not a little odd looking.  All of the components have been laminated and roughly shaped, from now on it's new territory.  The form from the drawings and model are only a guide, the sculpting and fine details will come from working and whittling away at the wood.

I'll stop here for now, pop back later for the next stage....