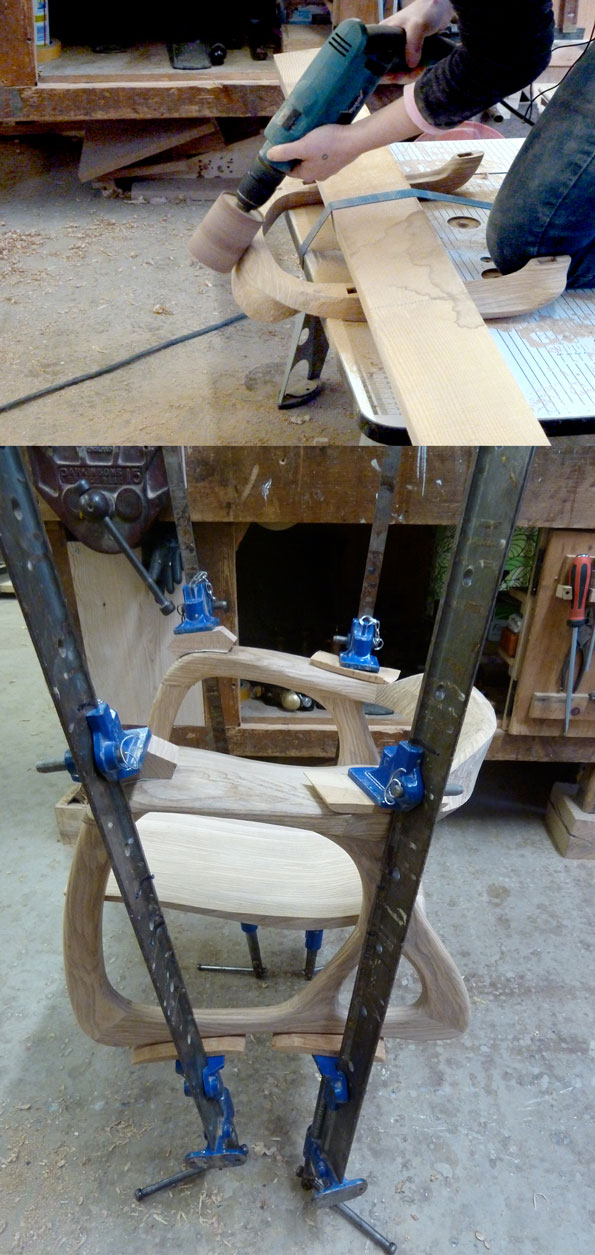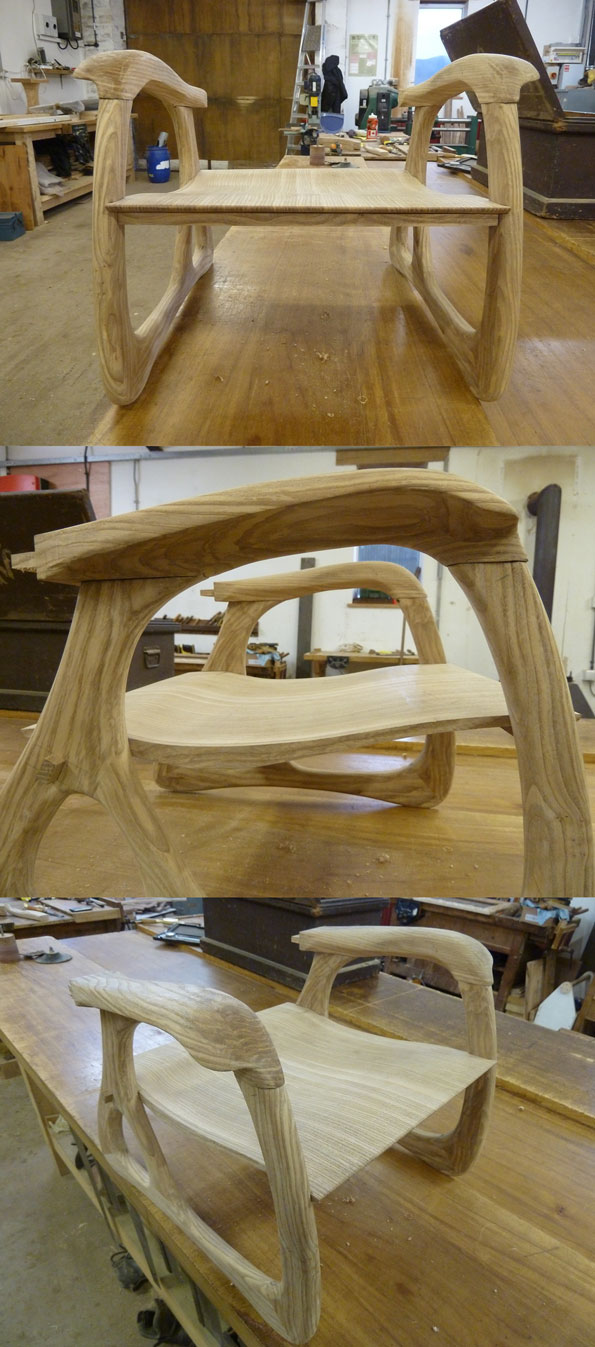
Last time I left you with the arms practically finished. Here's the main chair components put together on a dry run. It's all coming together nicely, but I was getting anxious to smooth out the joints because that's when the flowing form will really shine. Firstly, that form will really come from the addition of the back rest, from then on I can work away the overall form to make a comfortable seat.
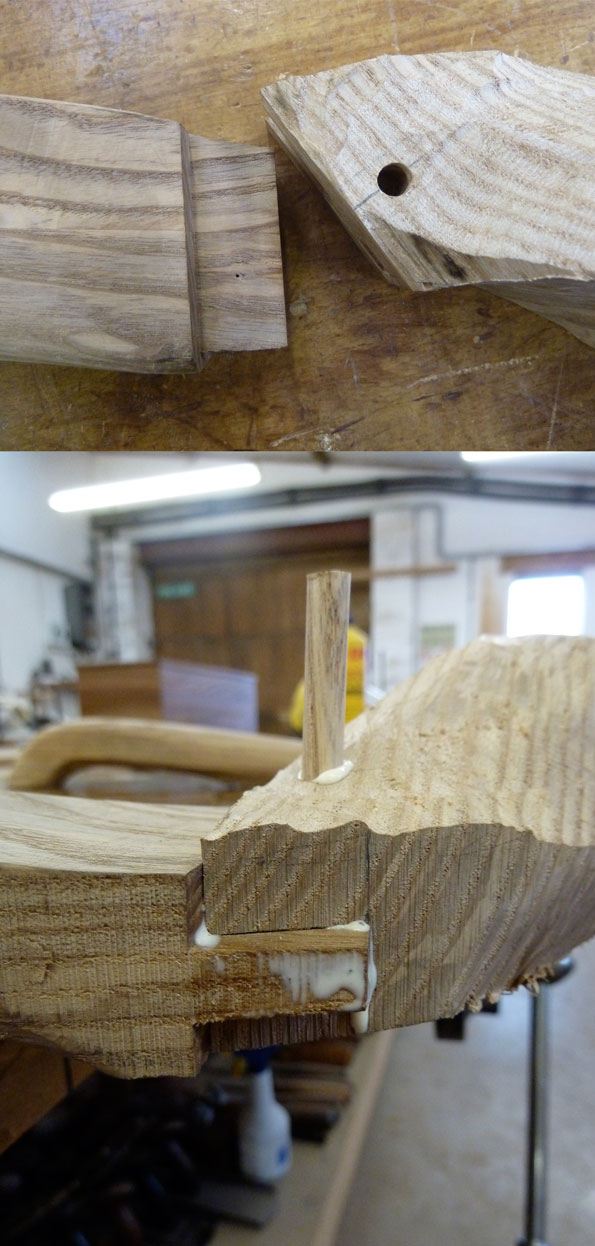
All the straight edges went a long time ago, but I needed to squeeze the arm / backrest joint so that all the gaps closed up nicely. Instead of clamps I had to use a peg. The holes on either piece were off-set ever so slightly. That way, when I tapped the peg in it pulled the joint into itself. A handy little trick that worked really well.
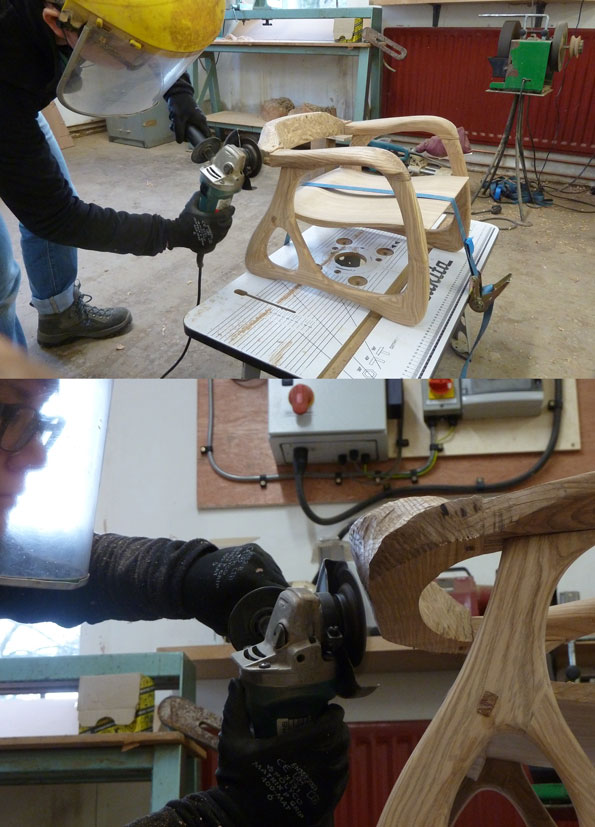
Now the fun part! I love my power tools, it's a well know fact. To chip out and carve the shape quickly I armed myself with a angle grinder with an Arbortech bit (and some noise-cancelling earphones and a bit of AC/DC) Needless to say, I was having a great time.
I sanded and chiseled for the finer shaping. However, once it was all glued up there was plenty more to be done as the smoothing out of the joints did alter the shape fractionally.