Raise a glass to Mr & Mrs. Murray

I told myself I wouldn't cry, but when you attend the most the beautiful wedding of a very special couple indeed, it's hard to compose yourself. Emma and Oli have pulled an incredible event together in only 4 months, and if you were there, you'd know how impressive that is.  The attention to detail and immaculate organisation was flawless.  No cliché here; it was the most beautiful wedding ever!  What a shame it came and went in a flash.

Sitting back home in the North Lakes and piecing together the memories and photos, I realise I have been in a World of Weddings.  A few months ago the couple took me out for an innocent Dim Sum dinner in London.  Little did I know it was bribery.  I left sleepy and full of dumplings, with my head full of wedding plans and promises of church readings and to create the seating plan for their reception.

The brief was simple, 9 tables will be named after the destinations of their European roadtrip honeymoon.  There will be around 180 guests.

I wanted to create something unique that would provide mementos to the guests and a keepsake wedding present to the Bride and Groom.

Many ideas came and went, including an 8 sided revolving picture frame.  Eventually these blocks of wood, which reveal the table names, came about.  They were created in 6 types of Cumbrian wood, each one with a contrasting Sycamore centre, dovetailed in to slide across.  The names were lasercut into each one, fingers were crossed that there weren't any spelling mistakes!

The blocks were for the guests, but as they are removed they could be revealing something underneath too.  It was decided the blocks could be contained in the wedding gift.  Two frames; one Oak containing a subtle Oak leaf relief, and one Sycamore containing a Sycamore leaf relief.

I was honoured by so many people taking them home.  Unfortunately the contrast of humidity between Cumbria and Gloucester during this crazy summer of ours affected the fit a little too much for my perfectionism, but overall I'm thrilled with how it turned out.  The 'making-of' to be blogged soon.


How thick?

Things seem to be testing me recently.  I've been trying to see the funny side of it, but when things add up it gets tough.  Take my computer for example, it's in the Apple hospital at the moment, having all of its insides replaced.  Not a cheap proceeder.  Turns out I've been on borrowed time for 2 years until it finally conked out.  It's really thrown a spanner in the works, hence why I've been so distant recently.  Ironically, it died just as I had finished and installed my stupidly organised computer cabinet at home.  I guess the timing was perfect for my back ups, but now I have all my computer nogans hooked up neatly in lovely cabinet with nothing to do.  Fingers crossed those Apple Genius' can make it new and happy again. Besides pleasing my obsessive organisational needs, I wanted to create a piece that tested the thickness, or thinness I should say, of solid wood furniture.  Everyone knows wood moves and cups, and the thinner it is, as the theory says, the more likely it is to distort as it dries out.  When furniture was being made from engineered materials like chipboard it meant clever veneerers could make thin lightweight pieces look solid without this risk.  Unfortunately, I like these lightweight designs but love solid wood.  Against all the advice in the workshop I went ahead and machined up 15mm Beech.

As it was only for me I designed the simplest set up, quite Utility Furniture-esque.  My very generous Landlady, Jan, gave me a wonderful set of bead drawers, perfectly and naturally distressed, they'll be good for my filing and stationary.  The depth of the whole cabinet had to accommodate these drawers and a 4 socket power extension, as well as my printer.  The back was left open for easy access and wires.

Finally, I have been wanted to collaborate with Kim Butler for ages.  Kim is the resident wood carver and can often been found chipping away on Danny's old bench, or scorching beautiful carvings outside.  When I asked if she would add her finishing touches to my cabinet I was thrilled when she came up with these cute buttons.  Her colour matching was spot on and really pulls my tatty old drawers into the whole scheme.  Thank you Kim!

And so, the verdict.  Well, it wasn't the biggest item ever, but it's not the smallest either, yet it has turned out fine.  The top and bottom surfaces were extended past the sides by 2mm so that, if it were to open up, the join would remain neat.  Considering there is some spalted Beech laminated together and jointed with not very large housing, the movement is minimal.  There was some splitting at the end of the laminated top and bottom, that was super glued and clamped, however most of that was planed away during the finishing touches.

I conclude that 15mm solid wood is not a disaster waiting to happen, as long as it is done with lots of care and attention.  This cabinet had a spacing of 400mm between upstands and carries very little weight.  Something larger with lots of heavy keepsakes would definitely need something thicker.

...I also conclude that I am a neat freak.


Going Waney

I must admit that before working at this workshop, I didn't really like natural edge.  Funny really seeing as the likes of George Nakashima and Wharton Esherick, to name only a few, are my heros.  To use it, it has to be used well.  Too much and you're teetering toward that horrible 'rustic' appearance. So for this project, a picture frame for a wedding present, I surprised myself that I decided to embrace that waney edge gamble.  Initially I wanted to have two sides bookmatched, with some fascinating burr.  Unfortunately natural edge limits you to specific types of wood.  Elm is ideal because it generally has little or no sap wood. (the lighter coloured wood between the bark and old trunk of the tree.)  Sap wood rots and crumbles, it can be pretty unstable, so best avoided for this situation.

We looked far and wide for a really special bit of timber that could be bookmatched, but with no luck.  However, having put together the chosen piece I think bookmatched could have been borderline rustic.  At the end of the day, the frame is to compliment the picture.

Some sly little jointing and chiseling had to be done to let the natural edge meet the other edge at the mitre corner.  Otherwise it was straight forward with a super sharp plane and a 45 degree shooting board.

I slipped some 0 bisciuts into the corners, just in case.  Tentatively clamping up each corner at a time, making sure it's all square, the mitres closed up perfectly, even the natural edge joints.  

Both for asthetics and additional strength some kerf joints were added in a smart contrasting veneer.  Once the frame had been smoothed out, sanded and oiled the effect worked brilliantly.  I positioned the burr so it will sit just onto the pictures mount at the bottom right hand corner.


The Toolman

We had an unexpected visitor to the workshop on friday.  Every once in a while The Toolman stops by to say hello and show off his spoils.  I have only met him a handful of times, but he's a fascinating character.  Travelling the length and breadth of the country visiting auctions, John has a vast collection of antique tools of all shapes, sizes, uses and ages.  Most of what he buys and sells he knows the history or the previous owner.  I was privileged to visit him at his home last month and the collection doesn't stop at his van, it is clearly a worthwhile passion of his...

This week he had two boxes of hammers, only a fraction of the 360 hammers he won at the last auction he attended.  As you do.

Seeing a selection of hammers really demonstrates the incredible variety one instrument can have for doing a number of different jobs.  Hammers do so much more than bang things.  The shapes, weights and sizes all depend on the job.  This one pictured is a roof tilers hammer, it's quite lightweight, well used and beautiful.

During my time at the Workshop I have really developed an appreciation of hand tools, their design, history and how to use them properly.  Antique tools aren't too dissimilar to the pieces of furniture they help create.  They are specific to the owner's needs.    A new handle is turned especially.  The weight of the tool in your hand should feel right.  The sound the tool makes on the wood tells you so much about the wood, as well as the tool.  The blade is honed and sharpened time and again throughout each project, slowly altering the shape a fraction of a millimetre at a time.  Each time you sharpen your tool, the better you know it, the more automatic the actions become.  Both the tool and the craftsman mould to each other over time.  Improving with time.

Sifting through The Toolman's collection there are years of peoples lives.  All sorts of names stamped in boxwood handles.  Patches of worn metal were the previous owner has held this plane or that chisel again and again, always in the same spot.  Blades only a few centimetres long, the rest has been sharpened away after a long career.

The first thing you need to look for when tool shopping is the stamped emblems of the steel manufacturer.  This is were antique tools are far and beyond the best tools for the job, because back in the day the blades were made with better, purer steel.  It might take a lot of hard work and time to get them back down to working condition, but when you do it's worth it.  The quality of the steel is vital for keeping a sharp edge for longer and providing cleaner cuts to the wood. 

If you would like to get in touch with John, let me know.  I'm sure he will be ever so happy to talk tools.  Gather up your questions because there isn't much he doesn't know.  I have also been meaning to do a blog post about Huw's incredible tool chest.  Watch this space for that update.

How to live 'Sustainably'?

I have been a very lucky lady.  A few weeks ago I was offered a place on a trip to Romania for a Green Village Project, organised by Grampus Heritage and Training Ltd.  They specialise in European projects, involving a number of countries, demonstrating, exchanging and collaborating traditional cultures, crafts and skills. It was set around a remote village close to Auid, Transylvania.  The village is quite remarkable, for an ill-informed Londoner like myself.  Almost every part of the function and survival of the village, the surrounding land and the residents, is sustained within their land.  During our 4 day stay there we only ate vegetables grown by the host, Monica's grandmother, sausages and smoked meat from their pigs, eggs from their many chickens, wine and grappa from their grapes, water from their well, bread from their flour, pickles from their own vinegar, the list goes on.  Lunchtimes were banquets of typical village food - all naturally delicious, and 100% organic.

However, we had to work for our lunch, the real reason the project was there, to build a traditional green fence strong enough to keep huge wild pigs off the potato patch.  Using only one chainsaw and a horse and cart a few of us wandered up through the vast orchard (planted by the co-operatives of the Communist rule.  When land and property was finally returned to their rightful owners there was a lot of work to be done by individuals, so some became neglected and left to ruin - like this orchard) to the woods and collected young trees no thicker than 2 inches.  Back at the potato patch green poles were striped of their bark and spaced evenly.  Removing the bark allowed the young trees to slide along the poles when they are weaved and pushed down.

Working with at least two young trees at a time, the weaving begins in a systematic way, always starting on one side and moving along one pole as you add.  On the next row you start on the other side.  Once a substantial 'base' has been created the trees are stabbed in the weave close to a pole and bent down, filling in any gaps or thin areas.  It's definitely a two man job.  The locals were full steam ahead and jibber-jabbered away in Romanian (fuelled with grappa) so I just stepped aside and admired the speed they worked at.  Jumping on top of the weave to flatten it down seemed vaguely helpful, sometimes.

The finished product was beautiful, cheap and so strong, using all my weight it didn't rock at all.  This years potato harvest is going to be a good one!

So, can we look to these people's example and see a sustainable future?  This was the question I set out to answer on my travels via the metropolis of Manchester.  I conclude not really.  Our global society would not and should not step back to an almost medieval existence.  However, there are things that make sense which needs to be echoed the world over.  Firstly the understanding of how and where our food and resources come from.

If you appreciate the real cost or effort of growing a potato harvest fit to feed your family for the year ahead then I believe there would be a dramatic change in the amount of waste.  A change that I think will echo in purchasing and consumption.  This family rinse scraps from their pots and plates in a little bit of water to feed the dogs which guard their home.  The chicken poo is collected and fertilises the potatoes.  Everything has a use.  In London we may not all have chickens, cows and a garden big enough to grow our veg, but we do waste food like it doesn't matter - that's from the disconnection.  I wonder what a difference community compost heaps could make.

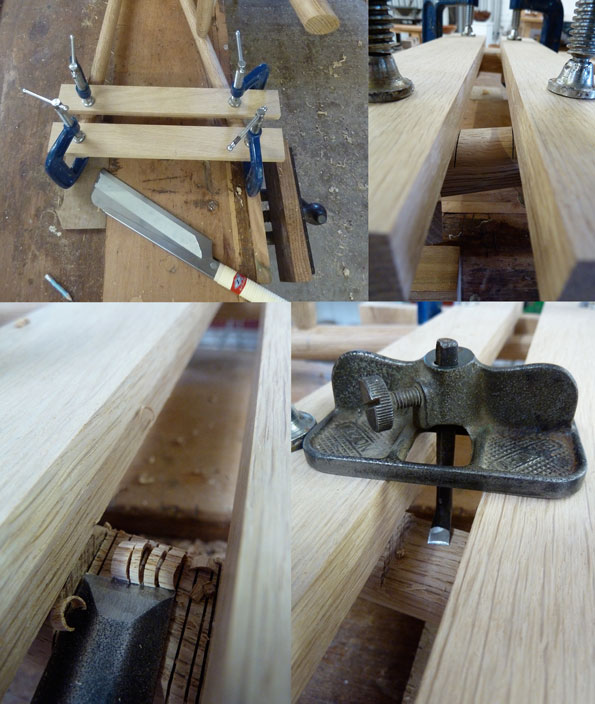
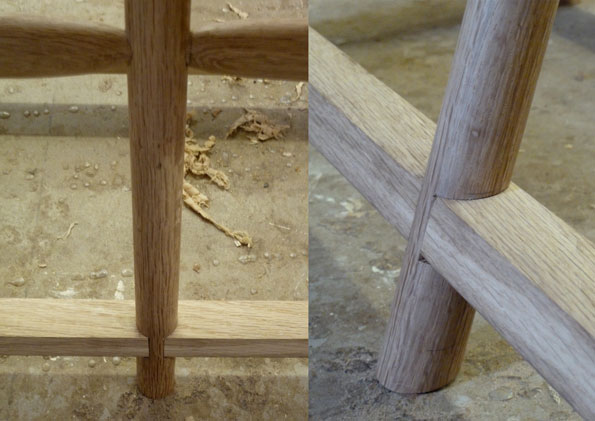
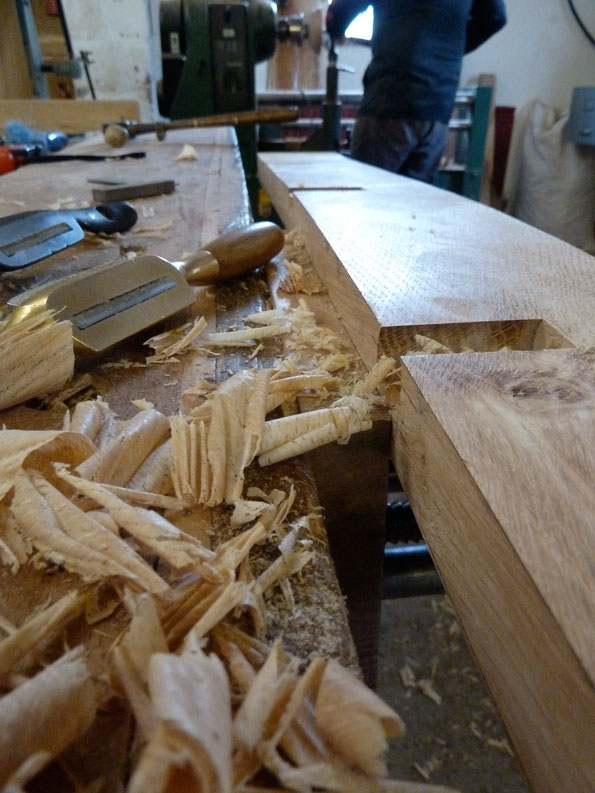
Another lesson to be learned is the use of the materials and resources we have to hand.  Discounting the chainsaw fuel, labour and grappa, the material for our green fence was essentially free.  The trees selected were the right size but also removed to thin out the woodland, something which every woodland needs for it to develop into a healthy ecosystem that can become a benefit environmentally and commercially.  In England our wood product is practically a waste product of recreational programmes within our National Woodlands.  There have been incentives and grants set to encourage people to plant trees but the important emphasis on what and how to use these new woodlands is dying out.  Simultaneously industry has either replaced varied hardwood woodland for fast growing softwoods or extensively imported from as far as New Zealand.  I can see a catalyst for change happening from a creative look at what we need and how it can be provided for by what we have already.

The first thing that grabbed me as we drove into the village for the first time was the strange, alien-like trees dotted around the landscape.  The ancient art of pollarding and coppicing Willow is clearly still widely practiced, and as I found out, vital to everyday life.  Here at home, we have hundreds of years history of coppiced woodland.  Aside from being beautiful homes to all varieties of insects, birds, mammals and wild flowers they provided firewood, food and materials.  Once you coppice you realise how resilient and amazing trees are.  The more you hack at it the more it'll grow back; three times more shoots for you to harvest and use next year.  Once upon a time all of our necessary materials came from what we had around us.  I have begun to really ponder on the realities of a fresh look at this tradition for some of our needs today.

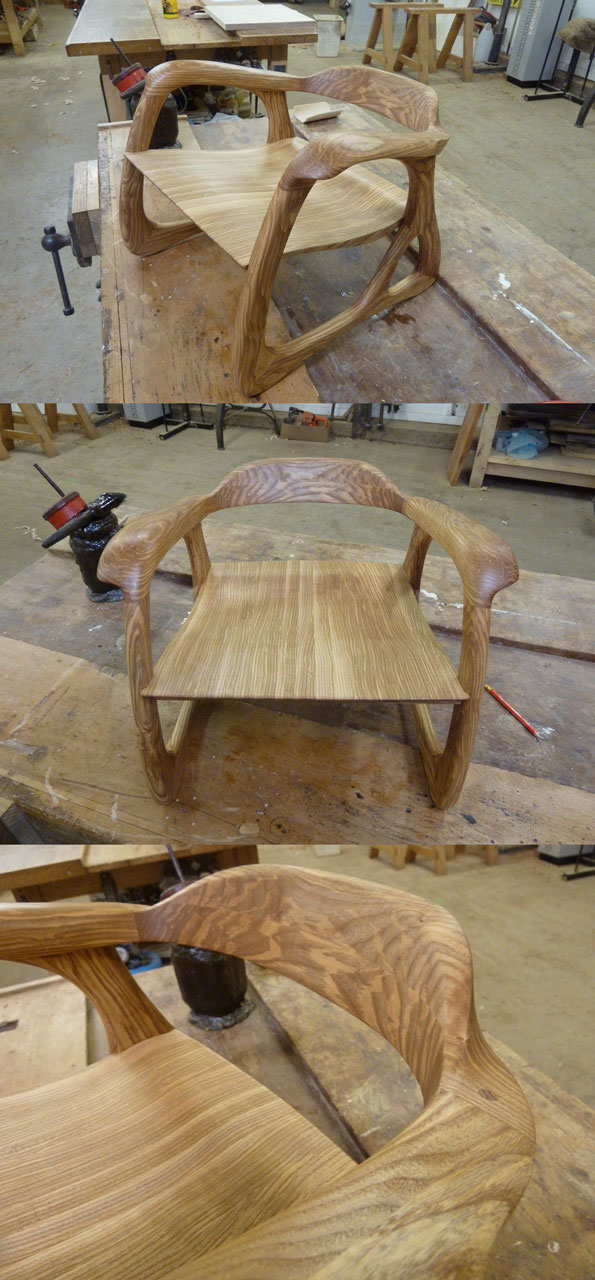
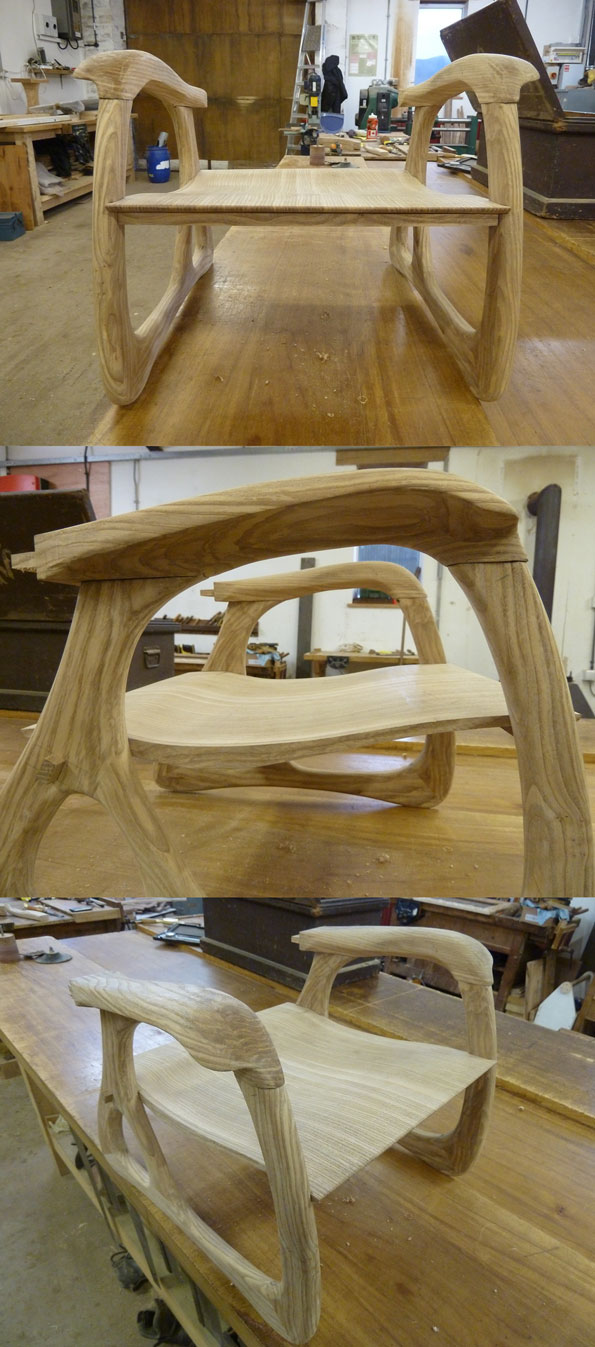
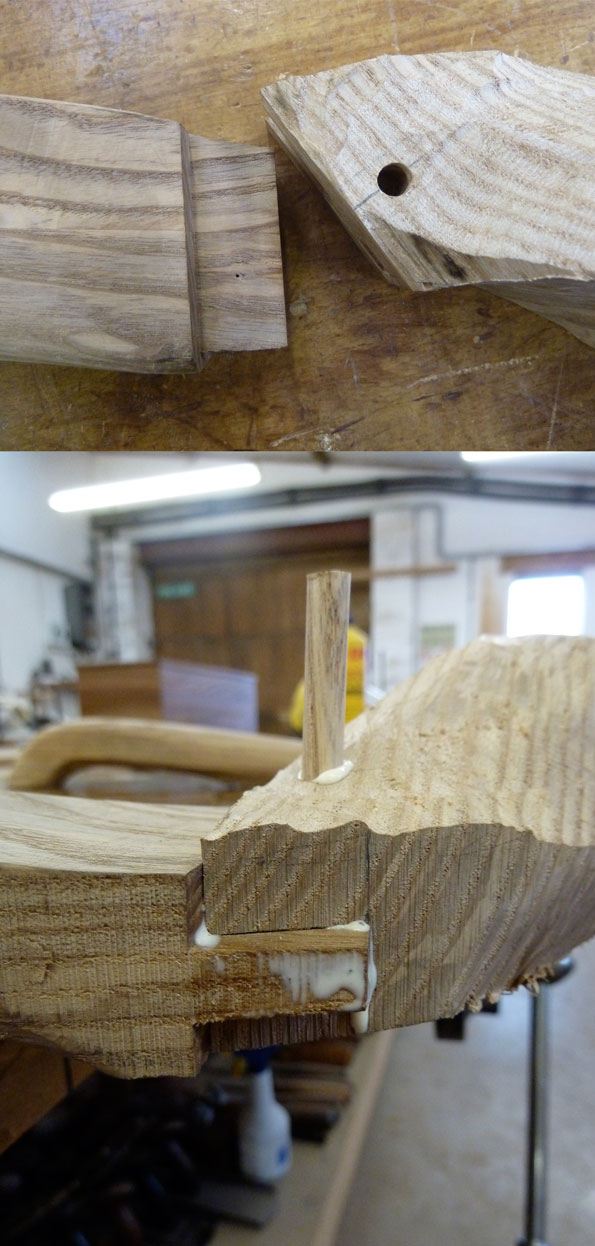
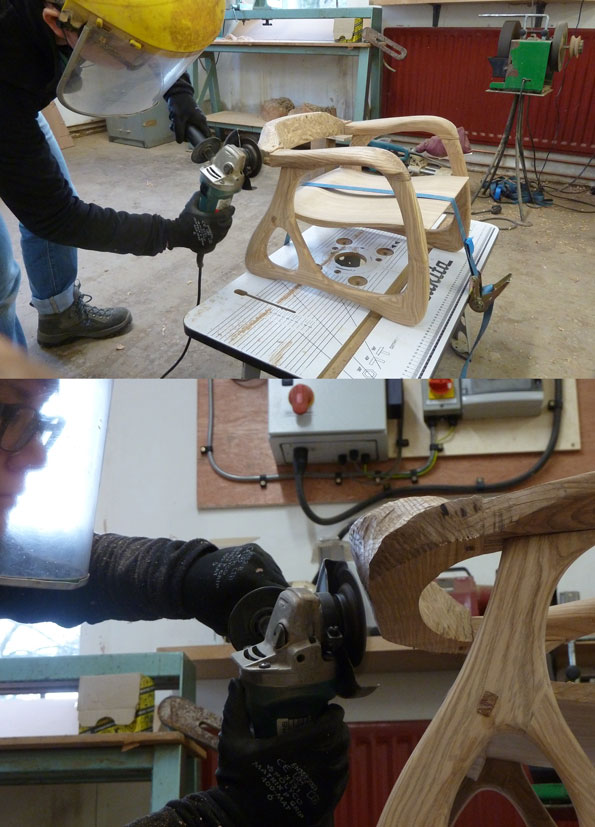
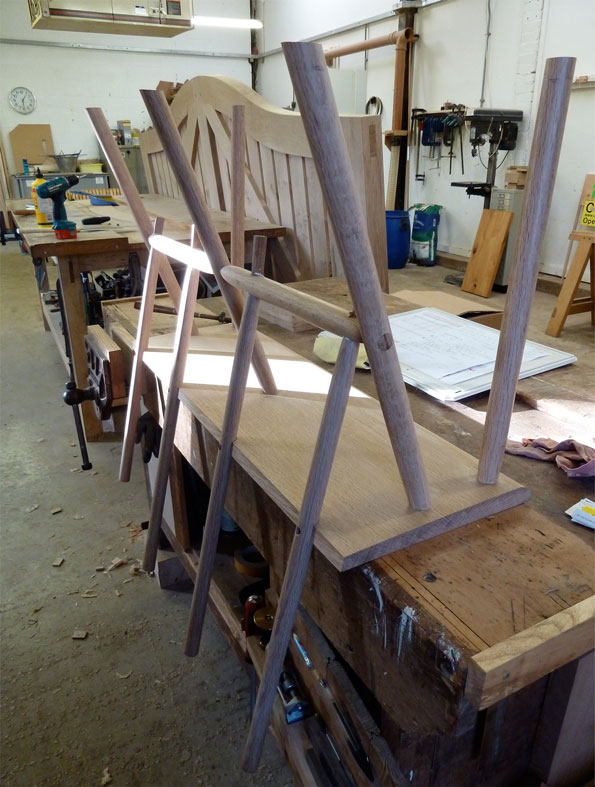
Finally, I must touch on the pros and cons of 'Working with your hands vs. Working with machines'.  It's an age old debate and many people, including the Arts and Crafty lot 100 years ago, have approached it far better than I ever could.  The point I will highlight though: the debate is still happening and still as important.  The reason why this Romanian village is beginning to struggle is the fact that the young people are moving to the cities to find work.  Tending the land by hand just does not pay.  The orchard has been left to waste because it would take a huge, fit team to prune and harvest it every year.  The price of food has dropped because of the use of machinery, for organic hand grown produce to compete just isn't viable.  I visited the market where all the local farmers trade and swap their spoils, these people know and understand when and how food grows, so they know not to buy things out of season, why? because otherwise it doesn't taste as good, simple as that.  Back in the UK we've lost that and prioritise cheap and all-year round convenience over flavour and nutrition.  Looking at these big issues through the food market is helpful.  It encapsulates what the consequences of industrial trends are because it's an everyday need.  The product and furniture market roughly follows the same story, with a few extra things thrown in.  The machine has opened up so much to so many people, which is a good thing, for the short term.  We are at an advantage point, where everyone (in the UK) has access to their basic needs, from here we can begin to plough forward with long sighted vision.  The slow food and organic movement started from a change of attitude of the buyer.  People began to demand better because it's better for them in the long run.  Can this not become the big trend of the mid-twenty first century?


The Mathilda Chair Part 4

Getting the joints smoothed out

The clamps came off and I set to work to get the sweeping lines that I hoped to flow across the whole chair.  The smooth lines will be a tactile feature for the baby, but also to give the impression of one piece of wood.  I think if it weren't for the crazy grain of this Olive Ash, it could possibly have had that effect.

This form needed plenty of sanding and careful chiseling.  The curves meant that the grain direction was changing at random spots all over the chair.  Here's the shape as it was before the final sand, still with its sharp, crisp edges.

Flowing curves before final sanding

And here's the chair all smoothed and sanded ready for that very exciting first coat of Danish oil.  We had been eagerly waiting to see how this dark Ash will oil up.  As expected the grain and dark colours jumped out at us.  Over time this chair will darken, and the markings may calm down a little.  A good bit of use (and a touch of baby dribble) will leave a wonderful matte finish.  The wonders of wood, it gets better and better with age.

I hope this little chair holds lots of fond, happy memories for its little owner.  May it serve her well.

The finished Baby Chair - before oiling
Curves and joint details - before oiling
The Baby Chair - oiling up
The Baby Chair - Complete

The Mathilda Chair Part 3

Things are coming together - taking a pause

Last time I left you with the arms practically finished.  Here's the main chair components put together on a dry run.  It's all coming together nicely, but I was getting anxious to smooth out the joints because that's when the flowing form will really shine.  Firstly, that form will really come from the addition of the back rest, from then on I can work away the overall form to make a comfortable seat.

All the straight edges went a long time ago, but I needed to squeeze the arm / backrest joint so that all the gaps closed up nicely.  Instead of clamps I had to use a peg.  The holes on either piece were off-set ever so slightly.  That way, when I tapped the peg in it pulled the joint into itself.  A handy little trick that worked really well.

Exposed tongue and groove joint with off-set pin

Now the fun part!  I love my power tools, it's a well know fact.  To chip out and carve the shape quickly I armed myself with a angle grinder with an Arbortech bit (and some noise-cancelling earphones and a bit of AC/DC) Needless to say, I was having a great time.

Armed with an Arbortech bashing out the sculpted form

I sanded and chiseled for the finer shaping.  However, once it was all glued up there was plenty more to be done as the smoothing out of the joints did alter the shape fractionally.

A little bit for fine tuning before gluing up

The Mathilda Chair Part 2

With the rough shape constructed, the overall form and flowing lines I had envisioned needed to be worked into the wood. Firstly, the rounded edges of the sides were a doddle with the use of a router, a little bit of spoke shaving and plenty of sanding.Small rails were made with through-tenons to help break up the look of the structural joint of the side. Through-tenons are also a wink to the Arts and Crafts ethos of deliberately exposed construction to demonstrate the piece is handmade. This is something I have noted local furniture manufacturers still do here in Sweden. (I'm on a wee trip away) Carefully housing the seat into the sides means it behaves structural and minimises any necessary dowelled joints that might distract from the flowing form.

Good bye corners
Good bye corners

Right, the main part of the chair is pretty much there. Next, the exciting carving the general shape of the arms and back rest. To make sure both arms matched, it was vital that each major shape change was done at the same time on each side. Using 4 different sized chisels along the changing grain directions and a lot of rough grit sand paper the shape smoothed out slowly but surely. I have to say, the freedom of this process was a lot of fun.

Roughly hand carving the arms
Sanding and smoothing out the arm's shape
Carved arms stage 1 complete

Here it is, the arms and the sides. Where they meet, the joints will smoothly blend into each other, however that can only be done once it's glued up.

Flowing from arm to leg

The Mathilda Chair Part 1

The Mathilda Chair And now I can present to you my latest project, completed and delivered.

An ambitious curved form, designed to be a stylish first chair for a little baby girl.  The ergonomic positioning, and deliberate wide seat will make those first unaided lounge-y moments easier.

Here's the design to product process:

From Design to Product

And here's the story:

Not long ago, my client came to me with an idea.  It had been recently announced that there will be a brand new member of his family arriving, and wanting to welcome the little tyke into this exciting world, came to me to create something special.

After a good think, some chats and brain storms, it was decided that, as much as a high chair or cot or wooden toy will be helpful, it just wasn't special enough.  Nope, this baby needs something that will be exceptional and everlasting.  A memento to her first few years.

Taking note from her Scandinavia roots, and wanting to add a wee salute to the design, craft and material ethos of the region, I designed a scaled down lounge chair.  This design has unusual proportions for a child's chair, but I thought the low, reclined position would be ideal for those early stages of sitting.  In the brief arms were a must, so falling off was avoided. From this starting point I decided to take this opportunity to create something tactile, sculptural, as well as developing a unique chair structure.  A mini chair for a mini lady.

There was much discussion about the type of wood.  Traditionally, furniture of the era I took inspiration from would use dark timber with hardly any grain markings.  I guess as to not distract from the form.  However, being a wannabe British Wood Ambassador, making a wooden chair by hand, from local timber it made sense to scrap that thinking and go with what Cumbria had to offer.  About 20 miles away from the workshop, in Penrith, there was a pretty old Ash tree.  I never saw it being milled, as that happened some 2 odd years ago, however I can tell it was a slow growing old tree by its extraordinary colouring and grain markings.  Ash is usually pale in colour with high contrasting, uniformed grain.  The boards Huw helped me pick out were distinctly dark with an almost tiger print pattern.  It was stunning - Olive Ash it shall be!

I have to admit that I got a little carried away in the beginning.  I had never used a spindle moulder before and the possibility to make multiple, delicate forms one after another, bing, bang bosh, was too exciting to skip.  I bashed on with the seat form first; a flowing curved shape, laminated with biscuits.  Here's the jig:

Laminated seat from Spindle Moulder

There aren't many straight lines in the final piece, but you've got to start somewhere.  The tricky angled joints were glued up before any shaping was done, that way clamping was a touch easier.  A template and the good old trimmer bit on a router made the shaping of the sides quick, easy and matching.

From straight lines to sweeping curves
The basic components, ready for sculpting

So far so good, if not a little odd looking.  All of the components have been laminated and roughly shaped, from now on it's new territory.  The form from the drawings and model are only a guide, the sculpting and fine details will come from working and whittling away at the wood.

I'll stop here for now, pop back later for the next stage....

Knit knit knit

Mondays are the best days of the week. Mondays mean that I can get back to the workshop and crack on with my current projects, and they also mean knitting circle evening.  For quite a few months now a group of wooly fanatics have been getting together, taking turns hosting dinner and treating each other to tasty nibbles and delicious cakes.  We're an odd bunch, at first glance.  From afar I bet you couldn't guess we were meeting to compare baking skills and purling achievements.  But this lovely oddball collection of friends have developed a healthy addiction to wool and all things associated with it.  Its one of the highlights of my week.

I must confess, the past 4-6 meets I have indulged more on the three course meal than stitches and projects we each have.  Things were going so well, until I finished my bonbon; the cherry on top of my hand knitting hat.  Since then projects have started, and fizzled out.  There hasn't been anything that I've wanted to get my teeth into, except...

The penultimate project that I still insist on starting ... AND COMPLETING, is The Giant Sock Project, or The Knitted and Felted Adult Sleeping Bag.  Granted, it'll take a lot of time, and a lot of wool.  Maybe it's these factors that have curbed my enthusiasm.  There is the beautiful, soft, perfectly formed cocoon-shaped sleeping bag in my imagination, can it be realised?!  We shall see.

I think learning to knit a normal sized sock and how to felt may actually be a sensible starting point.  Hence this little tester (please glance over the poor and ugly little sample square, it's not my best work)

It may seem like a small step to you, however this teeny-tiny little square has given me hope that I shall be sleeping toasty warm next winter.

The Mystery Project & New Toy

OK, so I've been very very quiet recently, but that doesn't mean I haven't been beaving away.  I've been working on a very special project, but it has to be a secret.  Here are some teaser photos which I hope don't give too much away.

It's really pushed my techniques and skills, there have been angles aplenty going here there and everywhere, which can be a right pain to get right.  There has been lots of routing, spoke shaving and sanding, which I'm pretty accustomed to by now.  However, wood carving is a whole new experience.

It has been pretty exciting being a little freer, with my mallet in hand, smacking little chips away, one at a time, bit by bit.  The results have come out far better than I imagined, so I'm pretty chuffed.  Unfortunately I can't show anymore pictures until it's finished and the secret is officially revealed.  Watch this space...

To prove I haven't been completely dossing, here's what all my hardwork over November and December has afforded me.  Christmas certainly came late this year when the DHL man handing over a parcel with my new hand plane.

It's a Lie-Nielson No.6 Fore plane.  That's like the mercedes of the hand tool.  It's shiny, beautifully made and rides like a dream.  In tool geekdom, it's a definite must have!!

Huw is the tool historian, he can name, date and describe in detail the use and any quirky story associated to any tool, tractor or rusty metal.  He makes hand planes, like this one but far more beautiful, by hand in his shed - as a hobby.  Any given weekend he is hunting out rusty heaps of tractor metal to make new again.  It's a amazing what he does and how well he executes it.  A very good person to know, therefore he was on hand to supervise the first honing and sharpening, just to be sure.  It glides over the wood so smoothly, and it is guaranteed square and flat every time, which was a mission with my old beloved No.7.  Hopefully it will serve me well for the rest of my furniture making career.  Nerdy tool chat over, I'll leave you with a portrait of my tool collection...

A Story of a Walnut Tree

Not too long ago a very special tree was brought to the timber yard, a local Walnut tree. What was once a common timber, English Walnut has become a rare sighting. It has a beautiful grain, dark and rich colouring which is hard and tough but a pleasure to work with. It was particularly popular for gun stock and carving, as well as mid-twentieth century furniture, along with other exotic timber with similarly dark colouring, like Teak and Rosewood. Nowadays most Walnut is imported from America or Europe, and usually in veneer form.So, when it was time for this tree to be milled, it's no surprise that there was an audience!

The exciting thing about watching timber milling is the story that is gradually revealed.  Like a huge book of history.  The average age of a tree that is milled at DF Timber is 50 to 250 years old!  Everything that surrounds the tree throughout it's life marks and affects it over time.  It stores events in its shape, grain and natural character.  Once felled and prized open, these events can be seen, sometimes in a poetic flow, other times in sudden and dramatic forms.

Only Huw has the guts to operate the big green timber mill.  This beast is loud and scary.  It shakes and vibrates like nothing and spits out sawdust and all sorts at quite a force.  It can cut a tree up to 4 ft wide and 25 ft in length, not the biggest available commercially, but has served DF Timber very well.

With every tree that is milled there is always the risk of the blade hitting something that is within the timber.  Throughout history trees have been convenient fence posts, notice boards, gate posts etc etc.  If a blade, like the 120mm wide blade on this big mill, were to hit anything substantial it could be lethal.  Everyone is on high alert!

This Walnut tree came from a garden, prime spots for all sorts of metal and stone to get lodged in a crotch or trunk, eventually having the tree grow around it.  It was on only cut No.2 that we hit a problem.

Right in the heart of the tree were two huge old nails.  Going by the size of the tree, they must have been hammered in at least 100 years ago.  For what reason - who knows!  I'm sure the guy had no idea he was going to completely mess up our blade, 2011.  Metal in trees stains and spreads up and down with the sap, so if you're buying any trees and you know there's going to be metal in it, best not bother.

The Woodmizer can cut far more accurately.  Here's George, the resident joiner, checking up on Huw's alignment.  A guitar maker had already bought one side of the heartwood.  The other side of the heartwood was going to a gun maker.  Needless to say, it wasn't long until every part of this tree had been snapped up.

It couldn't be a better day.  The sun was so bright and warm, the walnut grain looked absolutely stunning in it's light.  By this stage we were all oogling at the colours and sweeping grain marks.  It was a little sad to know that it will eventually be cut up into considerably small components, instead of being used for a piece that can show off its entirety.  You can't be too precious, I told myself.

I'm so glad I got to see this beautiful wood in this process.  Confirmed: Walnut is most definitely my favourite wood.


Times and Star: November 2011

"Meet the New Generation of Furniture Makers" See what the lovely people at Cockermouth's Times & Star had to say about everyone at DF Furniture! A great article, and the images come out swell. The Boot Bench and Bookcase look pretty neat on newsprint.

Grand Designs Live 2011

Phew, what a crazy week we've had at Danny Frost Furniture.  A last minute offer for a spectacularly well-placed stand at Grand Designs Live, NEC Birmingham, means it has been all hands on deck to get all the planning, designing, construction and necessary ordering done before setting off, stupid'o clock, leaving our beloved Cumbria.  Danny Frost Furniture, the other half of Danny Frost Timber, has recently been acquired by its long standing employees, Huw Lowden and Steve Younger.  Both are experienced and extremely talented cabinet makers.  Within the DF fold are a number of independent craftspeople, all with the special connection of the locally and sustainably sourced hardwoods, milled and seasoned at 'Frosty towers'.  Our stand was a little snap shot of what happens in a small workshop in the North Lakes; Danny Frost's popular best sellers; Jonathan Leech's elegant and simple turned bowls; Croglan Design's unique chopping boards; Phil Bradley's homegrown and weaved willow baskets; as well as my latest pieces, kindly loaned by my clients.

A special thank you must be mentioned to Jamie Chaplin-Brice for over seeing the planning and designing of the stand.  It clearly displayed everyones wares beautifully.  All the mental and physical hard work clearly paid off, going by the attention we received during the show.  Plus, his willow-rack shelving was a definite winner!

Jamie seen with his ingenious willow rack shelving

I personally have to thank Huw and Steve for all the support and belief they have shown in my work.  My Arts and Crafts Bookcase and Boot Bench got to sit happily in the stand, and as a consequence, received some very lovely feedback.


Boot Bench Part 6

Waxed and Oiled Dark Leather

Arriving at the workshop Monday morning I had a lovely big parcel to unwrap.  The leather had arrived and it was definitely well worth the wait.  A deep, dark brown, treated so it will age and texture very nicely over time.  With my lovely assistant, Frank, we set off cutting it down to 30mm strips.

It was pretty exciting to be using a very different material, with its very own quirks.  Cutting was fairly easy, but keeping the tension even so the strip remained the right width along the whole length meant precise, regular checks with the ruler and a firm hand down on the straight edge.

Cutting leather to strips

I wanted the strips and gaps to echo the dimensions of the rest of the bench, there is a 30mm theme throughout the piece.  Once the first leather ends were tacked on, evenly spaced, we were flying.  Poor Frank had to put all his strength into stretching the leather as taut as possible, while I hammered the tacks in.  Thanks to his help the rack is lovely and firm, ready for all the wellies its made to hold.

Stretching & weaving leather strips to bench rack

And there you have it... Project Boot Bench finished.

Just in time for the workshops exciting trip down to Birmingham NEC, where we will be exhibiting at the Grand Designs Live 7th - 9th October 2011.  It's all hands on deck for all the last minute bits and bobs for our stand.  If you happen to be in town, pop along and say hello, you can even see my Boot Bench in the flesh.

Oak Boot Bench w Leather rack
Oak Boot Bench w Leather rack_side view
Oak Boot Bench w Leather rack_rack detail
Oak Boot Bench w Leather rack_back view

Boot Bench Part 5

It was the week of the spoke shaver!  Blimey, two days spoke shaving the back rest.  Such a good workout, and when all goes well, hugely satisfying... A couple of templates were used as aids, but most of it is reliant on touch and look.  You would think that slogging away at some pretty tough oak for two days would put you off, but weirdly, the spoke shaver is currently my favourite hand tool.

Spoke shaving the back rest
Half way there
Half way there

Another template was used to mark out the corner details.  Because the back rest is curved along its length, it needed a flat piece of wood as its base, so when I put it through the bandsaw I can guarantee a square cut to the rest of the bench.  More spoke shaving to get that lovely smooth finish, as well as the subtle transition from flat to rounded edge on the top and bottom of the back rest.

A quick dry fit and the curve and joints worked out OK.

Rounding off the corners and testing the fit
Gluing up the back rest

Now it was time for the nitty gritty finishing touches, as well as the happy job of clearing away all the MDF jigs that have been camped under my workbench.  All the screw holes have been plugged with that lovely dark Walnut... Oh Walnut!  It was an exciting week at the timber yard ... milling a big English Walnut, I'll post about that some other time...

firewood jigs and walnut plugs

So here it is.  All the finishing touches, cleaning up and final sanding done.  Here's the oiling stages.  Oak is one of the few types of wood I enjoy oiling.  The colour really deepens and develops a rich shimmer.  (Sycamore and with other the light woods, the grain comes out beautifully, but yellows in colour.)

Oiling up
Oiling up
Oiling is so satisfying

I had hoped to have finished it this week, but my leather never turned up.  So Monday - more oiling and, hopefully, adding the strips of dark leather.  Watch this space...

Boot Bench Part 3

Where does the week go?  Things are really picking up pace on the business front, and my current project has really taken shape. This weekend also saw the first day of the workshops open studios exhibition.  If you haven't already done so, pop onto the C>art website and see all the other local Artists and Craftie-types that are opening their doors to the public.  Its an exciting time, that justifies all the hard work and dusty cleaning spree. (http//:www.c-art.org.uk)

So last week I had set up a jig for drilling the back-rest spindle holes into the seat.  All went well and I moved onto using the amazing big sander in the machine room to taper the seat ever so slightly across its width.  Planing the curved edge onto the front bottom of the seat took a while, but the shape is just as I wanted.

Shaping the seat
Shaping the seat

All the final prep was done for the through joints on the ends of each spindle.  Lovely English Walnut was kindly offered to me for use as wedges, which is going to really add a lovely contrast to the final piece.  I've been dreaming of making something with Walnut, it's such a beautiful, dark wood.  Very rarely does a Walnut tree pass through the timber yard, but when it does it gets quite a lot of attention.  I have my eyes on some, I must concoct a wonderful project to do it justice.

Wedged joints
Wedged joints

A couple of dry runs, putting everything together the back-rest spindles have been fitted nicely.  Jig no. 6 was rustled up for the secret screw holes that will join these spindles to the seat.  Finally, an all-over fine finish sanding for all components before gluing up  (if this doesn't make any sense what so ever, all will be revealed...)

Final prep for gluing

And here we are...  glued up with wedges and all.  I also got the boot rack frame mortise and tenoned and glued up.  Which leaves a bit of cleaning up around the joints and phase 3 of the project to crack on with Monday morning.

Glued and wedged
Glued and wedged

Check out Huw's incredible sliding gate in the background.  It apparently weighs 300kg, is 80mm thick and beautifully finished.  You don't want that to fall on your toe!

Boot Bench Part 2

It's been a very busy week, crammed full of all sorts of important bits n bobs.  The boot bench progress is coming along steadily. The spindles all have a lovely finish now that I've sanded them with 120, 180 & 240 grit.  All the components are pretty much done, now it's time for the jigsaw puzzle of making them all fit beautifully together. Firstly, the holes for the dowelled joints.  A few jigs and drill supports needed to be made to make sure there was no tear on either side of the hole.  The holes obviously want to be lined up and square so my legs go in the same direction, quite a bit of time was spent centring and squaring up each spindle.  With a newly sharpened forester bit, I'm really happy by how they turned out.

Drill jig
Drill jig

After a little bit of sanding back and dry clamping up I had the essentials all in place and labeled.  This is the really exciting bit when you start to see the design come off the page and into the real world.  From this stage I can reassess the construction schedule, theres going to be a lot of bits and angles that must be glued up just right, at the right stage.

giant jigsaw puzzle
giant jigsaw puzzle

Last thing of the week, create Jig no.4 for the angled joints in the seat...  Looking forward to Monday

Jig no.4
Jig no.4