TV Console Part 2

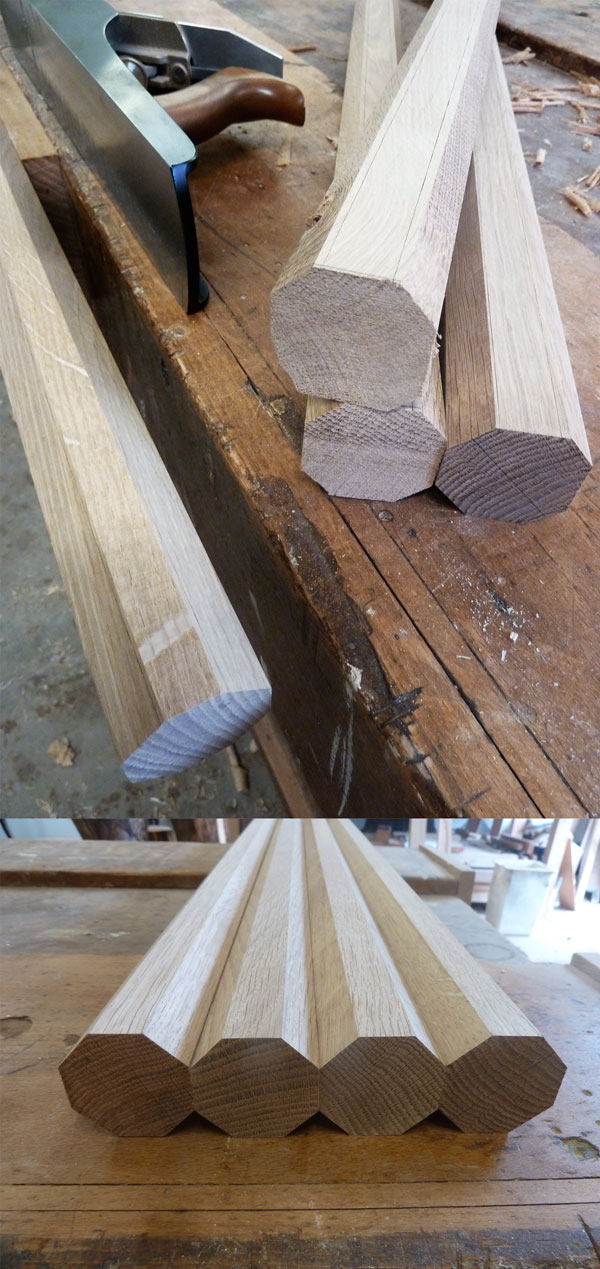
Following on from February (sorry!).... With the Octagon legs and shelves fitted nicely together, next was marking up and cutting out the housing for each leg to the thick top.

To hide the TV wires from the front elevation the back panel is set forward a smidge with the intention that its edge would match vertical slats to be installed later - keeping an open and light weight appearance and not so boxed in.

Fitting back panel
Fitting back panel

This back panel, in two parts, really needed to be lined up bang-on, so marking out the housing on both shelves and the top perfectly was really important.  The panels were left extra long for trimming to the shelf line-up further down the line.

Adding slat housing
Adding slat housing

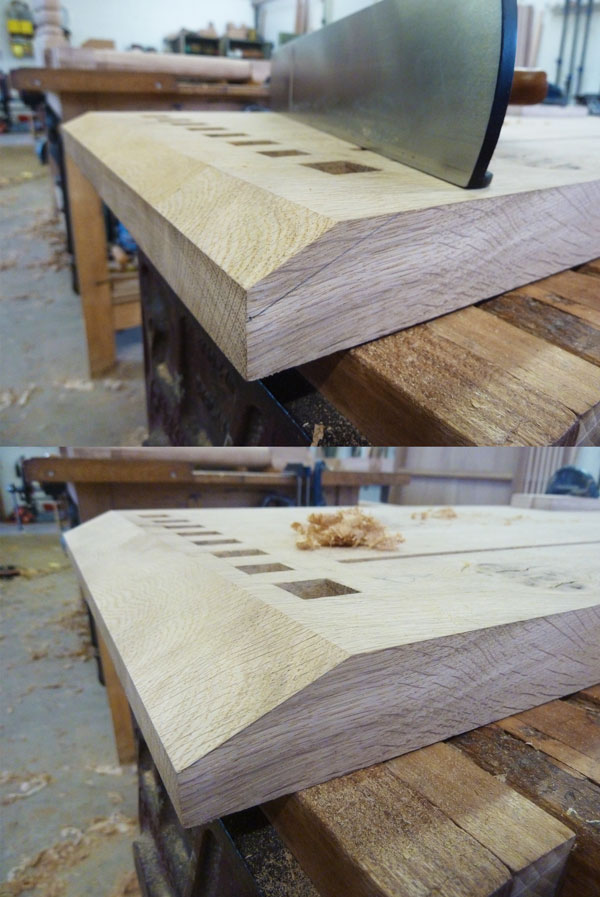
The spacing between the legs was divided up evenly for the slat mortises which were marked up and then cut by hand.  As the legs, and therefore the shelf edges are on a slight angle the top part of the mortise went a little further.  The middle surface of the mortise, within the thickness of the shelves, was hollowed out a millimetre or so to allow clearance for the slats. The timber will shrink over time so to minimise the slat joints opening up the sides of the mortise was kept as tight as possible.

Selecting the best grain and marks to be visible from the side, the slats were tapped into place.  To keep the joins neat the slats were left protruding beyond the shelf edge.  Once fitted the slats were coded, they will be fitted to the rest of the cabinet from their allocated position.  Smaller slats were added to cover up the edges of the back panels - disguising them as a slat.

While in a dry fit the under side of the top was marked out were the slats meet.  Using the router to remove most of the material, the joints were finished up and cleaned up by hand. My chisels had just been serviced so I was loving getting the edges and corner as sharp and square as it would let me.

Housing the slats into the top
Hand planing the chamfer to top underside

Two long, shallow Mackintosh-esque chamfers were added to the under side of the top with a hand plane.

Hand routing the plughole

Having played with many different designs for the plug holes, decision making was getting tested - sometimes over thinking things doesn't lead to much.  Going from the dimensions of the British electrical plug, I wanted to create a shape that gave interest, breaking up the rest of the lines of the console.  Referring back to my library of Arts and Crafts images, this shape was borrowed as it would allow the wires to fall to a central place.

Side and rear view of the TV Console
Front elevation of TV Console

Once sanded through numerous grits and oiled with Danish oil the English Oak really deepened to a lovely rich colour.  Getting in between each slat with an oily rag was slow but the overall scheme came together well.

Branch boiling

Getting preoccupied by the nitty-gritty of wood and what-not can really become distracting.  I decided to go back to the wood, how it is now and when I freshly harvest it.  What if I prepare the branches for bends or joints before I boil them?  How long will bigger samples need in my pot? I had a while, nearly 48 hours, to wait while my branches softened, so I made up a simple bending frame that will hopefully allow me to be flexible with my angles later (excuse the pun!)

How thick?

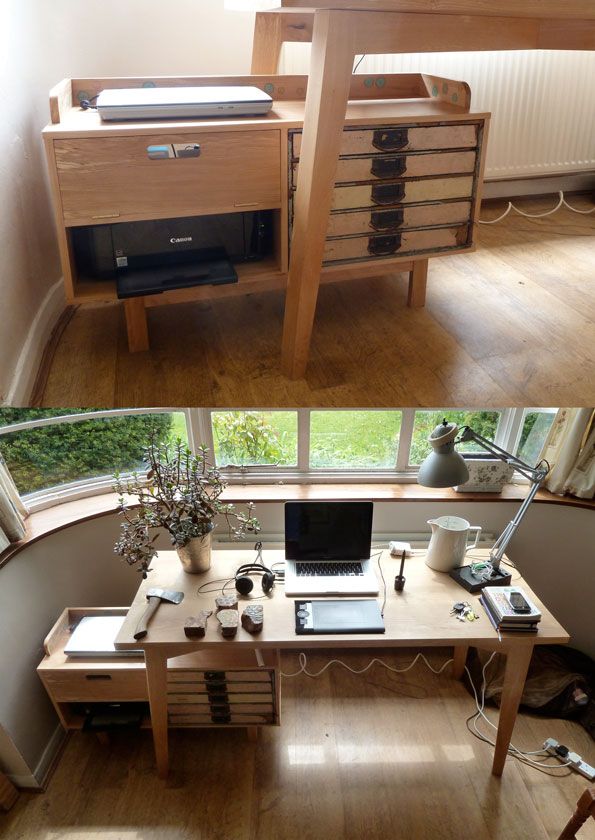
Things seem to be testing me recently.  I've been trying to see the funny side of it, but when things add up it gets tough.  Take my computer for example, it's in the Apple hospital at the moment, having all of its insides replaced.  Not a cheap proceeder.  Turns out I've been on borrowed time for 2 years until it finally conked out.  It's really thrown a spanner in the works, hence why I've been so distant recently.  Ironically, it died just as I had finished and installed my stupidly organised computer cabinet at home.  I guess the timing was perfect for my back ups, but now I have all my computer nogans hooked up neatly in lovely cabinet with nothing to do.  Fingers crossed those Apple Genius' can make it new and happy again. Besides pleasing my obsessive organisational needs, I wanted to create a piece that tested the thickness, or thinness I should say, of solid wood furniture.  Everyone knows wood moves and cups, and the thinner it is, as the theory says, the more likely it is to distort as it dries out.  When furniture was being made from engineered materials like chipboard it meant clever veneerers could make thin lightweight pieces look solid without this risk.  Unfortunately, I like these lightweight designs but love solid wood.  Against all the advice in the workshop I went ahead and machined up 15mm Beech.

As it was only for me I designed the simplest set up, quite Utility Furniture-esque.  My very generous Landlady, Jan, gave me a wonderful set of bead drawers, perfectly and naturally distressed, they'll be good for my filing and stationary.  The depth of the whole cabinet had to accommodate these drawers and a 4 socket power extension, as well as my printer.  The back was left open for easy access and wires.

Finally, I have been wanted to collaborate with Kim Butler for ages.  Kim is the resident wood carver and can often been found chipping away on Danny's old bench, or scorching beautiful carvings outside.  When I asked if she would add her finishing touches to my cabinet I was thrilled when she came up with these cute buttons.  Her colour matching was spot on and really pulls my tatty old drawers into the whole scheme.  Thank you Kim!

And so, the verdict.  Well, it wasn't the biggest item ever, but it's not the smallest either, yet it has turned out fine.  The top and bottom surfaces were extended past the sides by 2mm so that, if it were to open up, the join would remain neat.  Considering there is some spalted Beech laminated together and jointed with not very large housing, the movement is minimal.  There was some splitting at the end of the laminated top and bottom, that was super glued and clamped, however most of that was planed away during the finishing touches.

I conclude that 15mm solid wood is not a disaster waiting to happen, as long as it is done with lots of care and attention.  This cabinet had a spacing of 400mm between upstands and carries very little weight.  Something larger with lots of heavy keepsakes would definitely need something thicker.

...I also conclude that I am a neat freak.


Going Waney

I must admit that before working at this workshop, I didn't really like natural edge.  Funny really seeing as the likes of George Nakashima and Wharton Esherick, to name only a few, are my heros.  To use it, it has to be used well.  Too much and you're teetering toward that horrible 'rustic' appearance. So for this project, a picture frame for a wedding present, I surprised myself that I decided to embrace that waney edge gamble.  Initially I wanted to have two sides bookmatched, with some fascinating burr.  Unfortunately natural edge limits you to specific types of wood.  Elm is ideal because it generally has little or no sap wood. (the lighter coloured wood between the bark and old trunk of the tree.)  Sap wood rots and crumbles, it can be pretty unstable, so best avoided for this situation.
We looked far and wide for a really special bit of timber that could be bookmatched, but with no luck.  However, having put together the chosen piece I think bookmatched could have been borderline rustic.  At the end of the day, the frame is to compliment the picture.

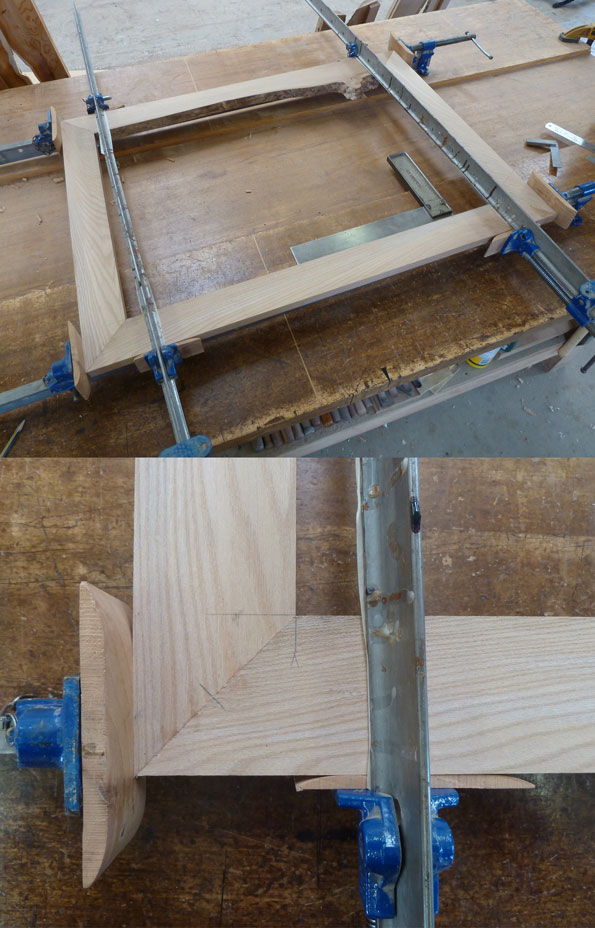
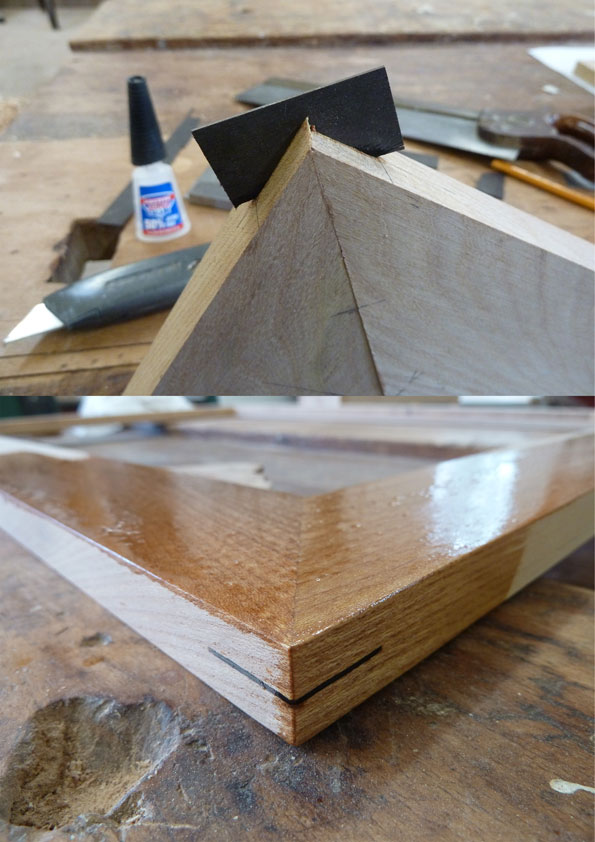
Some sly little jointing and chiseling had to be done to let the natural edge meet the other edge at the mitre corner.  Otherwise it was straight forward with a super sharp plane and a 45 degree shooting board.

I slipped some 0 bisciuts into the corners, just in case.  Tentatively clamping up each corner at a time, making sure it's all square, the mitres closed up perfectly, even the natural edge joints.  

Both for asthetics and additional strength some kerf joints were added in a smart contrasting veneer.  Once the frame had been smoothed out, sanded and oiled the effect worked brilliantly.  I positioned the burr so it will sit just onto the pictures mount at the bottom right hand corner.


The Mystery Project & New Toy

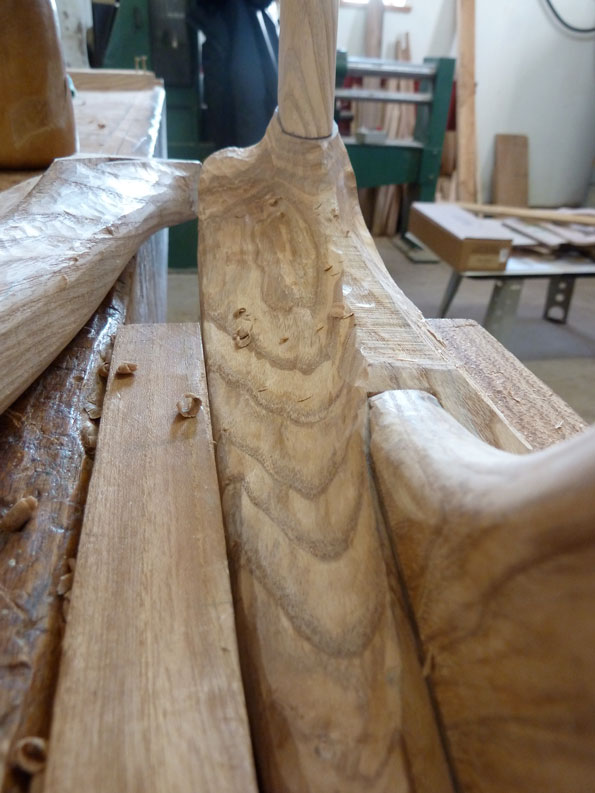
OK, so I've been very very quiet recently, but that doesn't mean I haven't been beaving away.  I've been working on a very special project, but it has to be a secret.  Here are some teaser photos which I hope don't give too much away.

It's really pushed my techniques and skills, there have been angles aplenty going here there and everywhere, which can be a right pain to get right.  There has been lots of routing, spoke shaving and sanding, which I'm pretty accustomed to by now.  However, wood carving is a whole new experience.

It has been pretty exciting being a little freer, with my mallet in hand, smacking little chips away, one at a time, bit by bit.  The results have come out far better than I imagined, so I'm pretty chuffed.  Unfortunately I can't show anymore pictures until it's finished and the secret is officially revealed.  Watch this space...

To prove I haven't been completely dossing, here's what all my hardwork over November and December has afforded me.  Christmas certainly came late this year when the DHL man handing over a parcel with my new hand plane.

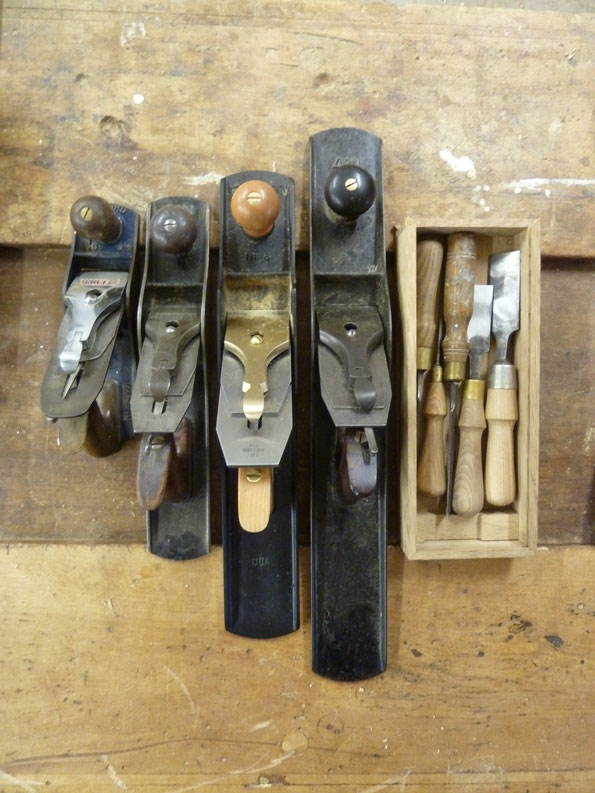
It's a Lie-Nielson No.6 Fore plane.  That's like the mercedes of the hand tool.  It's shiny, beautifully made and rides like a dream.  In tool geekdom, it's a definite must have!!

Huw is the tool historian, he can name, date and describe in detail the use and any quirky story associated to any tool, tractor or rusty metal.  He makes hand planes, like this one but far more beautiful, by hand in his shed - as a hobby.  Any given weekend he is hunting out rusty heaps of tractor metal to make new again.  It's a amazing what he does and how well he executes it.  A very good person to know, therefore he was on hand to supervise the first honing and sharpening, just to be sure.  It glides over the wood so smoothly, and it is guaranteed square and flat every time, which was a mission with my old beloved No.7.  Hopefully it will serve me well for the rest of my furniture making career.  Nerdy tool chat over, I'll leave you with a portrait of my tool collection...

Times and Star: November 2011

"Meet the New Generation of Furniture Makers" See what the lovely people at Cockermouth's Times & Star had to say about everyone at DF Furniture! A great article, and the images come out swell. The Boot Bench and Bookcase look pretty neat on newsprint.

Grand Designs Live 2011

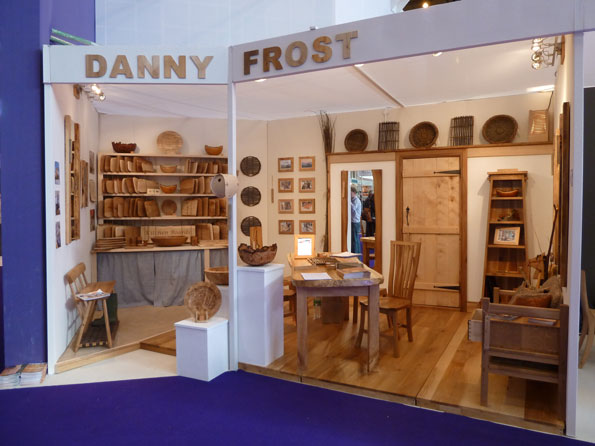
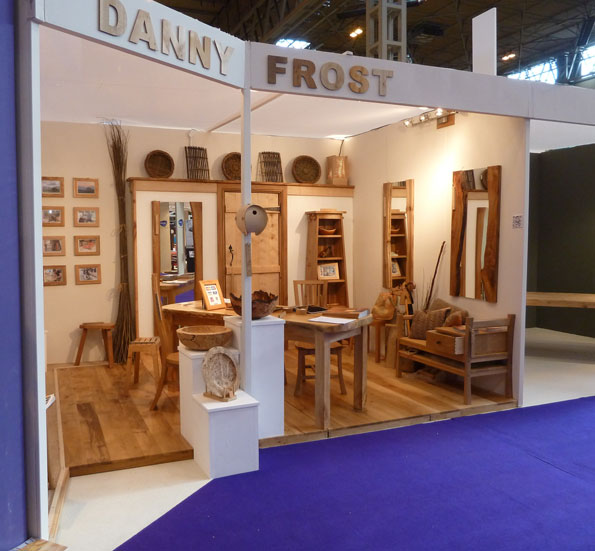
Phew, what a crazy week we've had at Danny Frost Furniture.  A last minute offer for a spectacularly well-placed stand at Grand Designs Live, NEC Birmingham, means it has been all hands on deck to get all the planning, designing, construction and necessary ordering done before setting off, stupid'o clock, leaving our beloved Cumbria.  Danny Frost Furniture, the other half of Danny Frost Timber, has recently been acquired by its long standing employees, Huw Lowden and Steve Younger.  Both are experienced and extremely talented cabinet makers.  Within the DF fold are a number of independent craftspeople, all with the special connection of the locally and sustainably sourced hardwoods, milled and seasoned at 'Frosty towers'.  Our stand was a little snap shot of what happens in a small workshop in the North Lakes; Danny Frost's popular best sellers; Jonathan Leech's elegant and simple turned bowls; Croglan Design's unique chopping boards; Phil Bradley's homegrown and weaved willow baskets; as well as my latest pieces, kindly loaned by my clients.

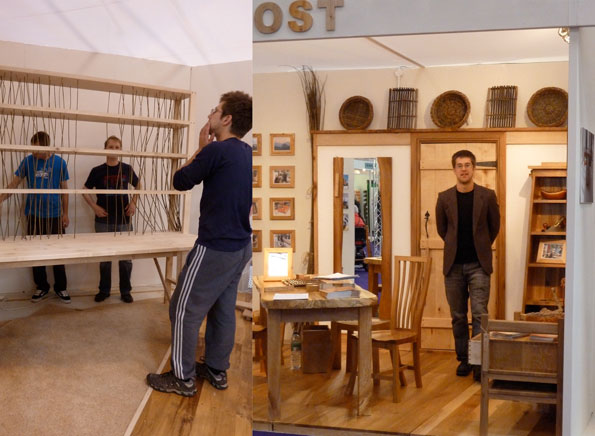
A special thank you must be mentioned to Jamie Chaplin-Brice for over seeing the planning and designing of the stand.  It clearly displayed everyones wares beautifully.  All the mental and physical hard work clearly paid off, going by the attention we received during the show.  Plus, his willow-rack shelving was a definite winner!

Jamie seen with his ingenious willow rack shelving

I personally have to thank Huw and Steve for all the support and belief they have shown in my work.  My Arts and Crafts Bookcase and Boot Bench got to sit happily in the stand, and as a consequence, received some very lovely feedback.


Going metal

I've been scrap-yarding. A friend of a friend has a whole bunch of rusty, old metal ripe for the picking. It's a treasure trove of tractor parts, ancient, dis-used agricultural equipment and other bits n bobs. I was like a kid in the sweet shop. It's amazing to see the quality and weight of how things used to be, and the shapes and details of some of the cast pieces are beautiful.

My imagination was going nuts, I wanted to leave with EVERYTHING. Thankfully, my friend reined me in. I settled for an early 20th Century cast window frame and began plotting an experimental piece that'll be my first welding project.

The lovely fellas at the steel engineering place sorted me out with the lengths for the framework. Ideally I wanted old stuff so it had the rusty, aged texture, but we couldn't find enough. Not a problem, we came up with an idea that may, or may not give the desired look.

So, after a few practice runs I pounced on squaring up the right pieces and welding them all together.

After the last bit of finishing touches, the frame was finished. By next week, it should be back at the workshop for the next phase...

Tea Time Tray

Over the past couple of weeks we've been busy blitzing through the workshop, cleaning and clearing out a few things. Its all in aid for the Open Studios event starting 17th September until 2nd October. Organised by the wonderful people at Eden Arts, over 100 Cumbrian artists and craftspeople will be throwing open their studio doors to the public and giving demonstrations of their unique skills. Everyone at DF Timber have taken it as an opportunity to publicly mark the hand over from Danny Frost to Huw Lowden and Steve Younger, the company's long standing employees. Its an exciting time for them, I wish them all the luck in the world.

Check out the website and keep an eye out for the bright yellow signs: www.c-art.org.uk

So, it was during this clear up that I stumbled on these old kitchen cupboard doors, and seeing as the new office needed an all-important tea-time work station I decided I'd turn them into a tray.

Kitchen door material

I decided I'd try some new techniques so I designed it with a wooden frame with curved corners.

Using off-cuts of Elm, I machined them up to strips of 40 x 40. The wobble saw on the spindle moulder was perfect for cutting out the L-shaped profile of the framework.

Wobble saw for frame

The corners were the really tricky bit. Luckily I had a beastly drill bit that was just the right diameter for the curved look I wanted. However, I had to be careful with the grain direction so as to not cause any weak points when its all glued together.

Once the drill (and pillar drill) had finally munched its way to just the right depth (it didn't half get hot and smoky) the corners with the perpendicular grain were cut out and squared off.

With a basic jig for the dowel joints, holes were tentatively drilled into the end grain of each piece.

The band saw cut out the curve, and all that was left was to spoke shave them to shape. It was so satisfying, I can tell you! The colour change from the frame sides to the end-grain corners really comes out now its oiled and after a quick sand with 240, its nice and smooth.

The kitchen cupboard doors are made of dodgy chipboard so the edges were sealed with a little PVA. Just gotta wait for the glue and oil to dry before sealing it all together...

2Hour Stool redefined

The first 2hour Stool design didn't quite hit the mark, so I smashed out a new prototype which had a few dimensions changed, joints revised and techniques practiced. Spoke-shaving the bevel by hand may mean I have a 4hour stool (at least), oh well, I'm so chuffed with how its turned out. The biggest difference has been the stunning off-cuts found in the machine room. A pretty rare 15" wide Wych Elm board sat smiling at me, and it's different grain direction has really added something special to it. Coupled up with the bit of Ash found in the same pile, for the legs, its the prettiest prototype I've ever made. While machining the Ash, its grain got more and more beautiful, and then cutting it to shape and planing, the ripples just shine. A poor mans Sycamore, lovely.

I've also included a few oiling pics, purely because I always get a kick from the deep, rich change of colour and reflection in the wood on the first coat. The camera really doesn't do it any justice.

Next is to make up some time saving jigs, set up some batch manufacturing and practice the hand skills, then, ta-dah, pips stool.

Stool no.1
Happy oiling Elm
Second Prototype

Challenge: 2hour Stool

The workshop has a challenge; to create a economical stool that's quick to make, practical and, of course, good looking. The record, from machining to finished product, goes to Huw's elegant plinth stool, created in 2.5 hours.

So today I set off at 8.30am, armed with one drawing and oodles of positivity that I could come close to competing with the Champion. As the day closed in at 6pm, I had to tip my hat in defeat. Although, it was only prototype day...

Elm legs
Mark up / square off
Cross rail detail
Stool gluing up